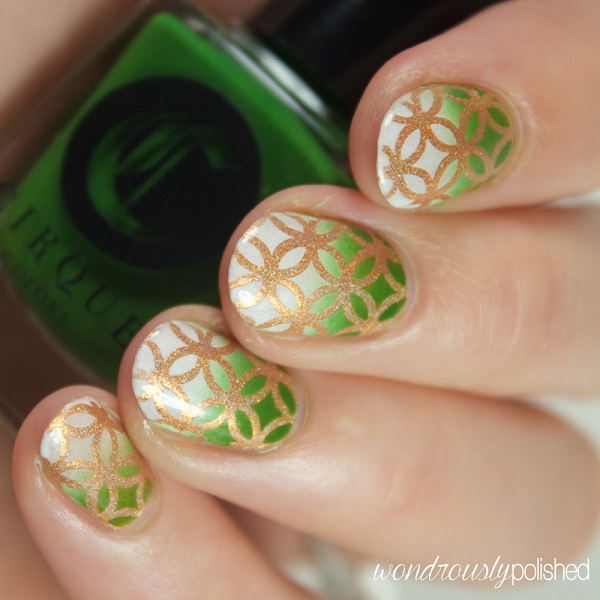
Feel the Ombre on your nails
Looking for a way to make your own Ombre nails? They are very pretty to look at but what gets you down is that they may be hard to do. It looks complicated at first glance, but what you need to know is that this nail art technique is easier than it looks. All you need to do is to prepare the right materials to get your own Ombre combination started. Don’t worry since you don’t have to be an expert nail artist to do this. In fact just about anyone can do this design. Simply have the creativity and patience to learn and you can create your very own Ombre nails whenever you feel like it.
Things you will need for Ombre nails
Pick two polishes that you would like as the top coat. From here you can already experiment on which type of nail color combination you wish to have, they can be on contrasting or blending colors. It is usual for Ombre nails to have blending colors, however it is always up to you on which color combination you wish to go for.
A sponge. This is actually the secret of Ombre nails. Not many people know it, but you don’t directly paint the Ombre on your nails. You will be using the help of a sponge to do that. Simple and easy. Make sure that the sponge is bigger than the size of your nail so that the Ombre colors will cover all parts of the nail evenly. Also make sure that the sponge is clear before you use it.
Plastic sheet and toothpicks. You will need these to clean up excess polish when you are doing the Ombre design. You can easily find these items around the house. If you can’t find any plastic sheets, foil or baking paper can also work.
How to begin
Start by applying a base coat. This is important since you will be applying layers on top and you need to protect your nails. A safe color would be white since it can host any color combinations on top without destroying the opacity of the colors. Though, the effect would also depend when you are using light or dark colors for your Ombre combination.
Look for a flat surface where you can pour your nail polish. Make sure that they are next to each other. You can add another color if you wish to have three color combinations in your Ombre; it really depends on the style that you’re going for. Pour them carefully and make sure that the colors are just touching at their edges. You would not like the Ombre to look untidy, just make them look like they’re sitting next to each other.
With the toothpick, gently swirl both colors together. You can easily control the areas here they will meet since that will determine the length at which the graduation occurs. If you wish for a longer graduation you can mix a bigger part of the colors. In case you only want that light fading effect, just mix them together just a bit.
Using the sponge gently dab it into the polish combination for a few times until the color sticks generously. Dab the sponge unto your nail. Do this continuously until the desired color is visible. You can do this a number of times but just make sure that the layers are dry before you add another coat to prevent it from smudging and ruining the effect.
When you are sure that the design is okay it’s time to add embellishments on top. You can do this if you have a certain theme like stars or hearts that you wish to add. However, if you want to keep the Ombre simple, just paint on a clear top coat so that the beautiful design can be seen clearly.
When you feel like the design is done, it’s time to clean up the nails. Dip your brush into the acetone or nail polish remover and brush off the excess polishes on your hand. You can also use a Q tip in case you want to get the bigger chunks of polish quickly.
See how easy it is? It doesn’t even have to require a lot of effort. You can even use materials that you can easily find around the house. Of course, the designs vary on what you want your nails to look like. You may combine the Ombre nails with stripes or beads or even French tips. For more styles, try to look online for references. There are plenty of blogs out there that can also give you a different style of Ombre nails. You can even check out videos that show you how to paint on some complicated and themed Ombre nail art.

Pastel colored Ombre nail art. Try out this baby blue and baby pink combination on your nails and see the sweet and soothing effect it gives.
GRADIENT NAIL ART
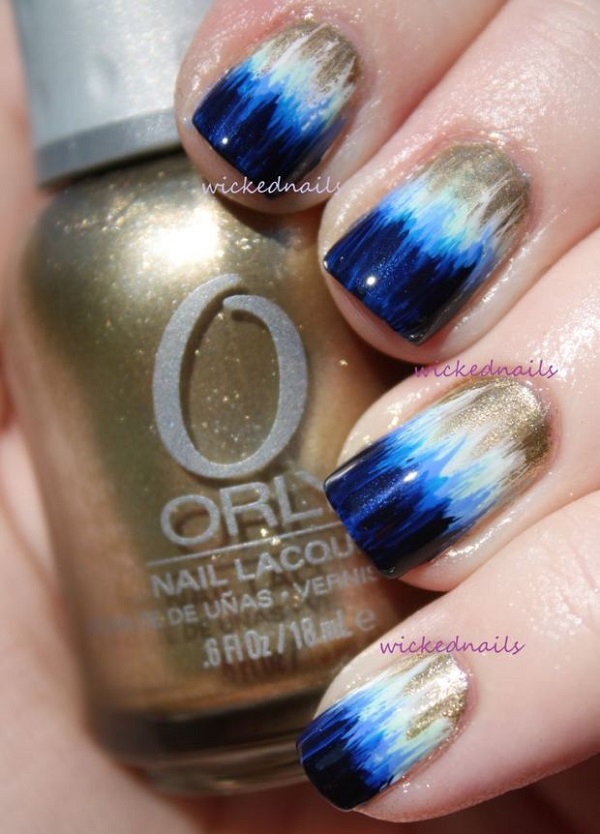
Blue, white and silver colored Ombre nail art. Give your Ombre nails a twist by adding glitter polish to make them stand out more.
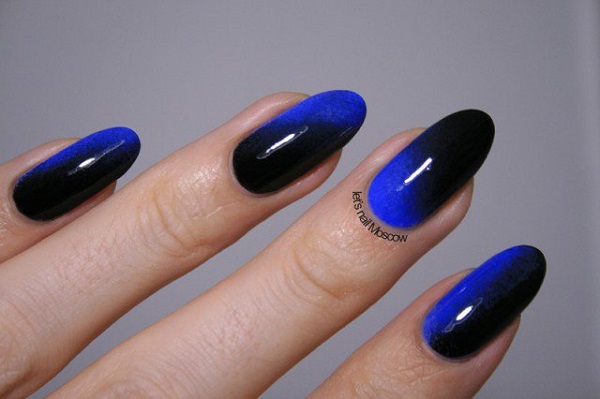
Enchanting black and midnight blue Ombre nail art. Use the shadow effect of black to highlight the midnight blue polish on your nails. It looks very elegant and sophisticated.
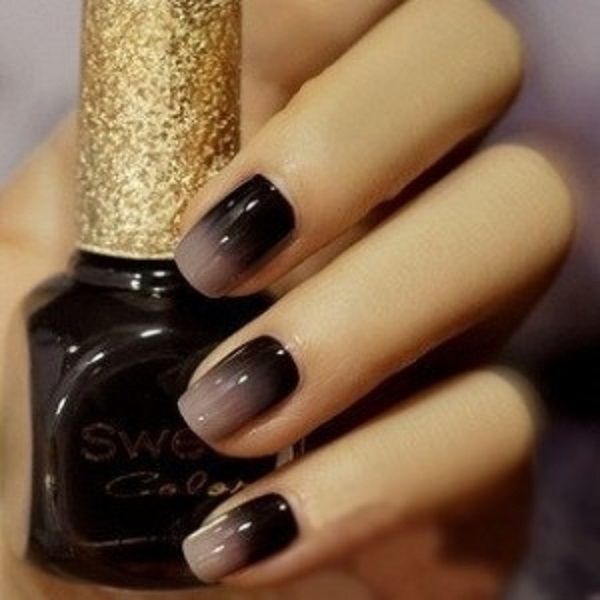
Black and gray Ombre nail art. A wonderful looking combination that gives a soft touch on the tips of your nails and a silhouette effect on the inner side of the nails.

Colorful glitter polish Ombre nail art. You can also make use of glitter polish for your Ombre nail art combination. Add flower details on top to make the background jump out of your nails.
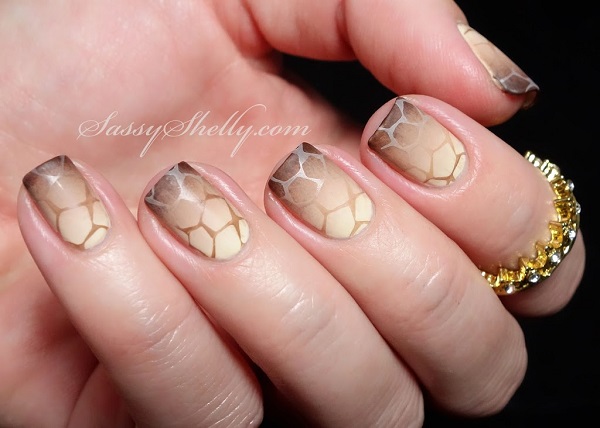
Turtle shell Ombre nail art design. Paint on turtle shell patterns on your nails and spice them up by adding an elegant nude and gray Ombre nail art combination.
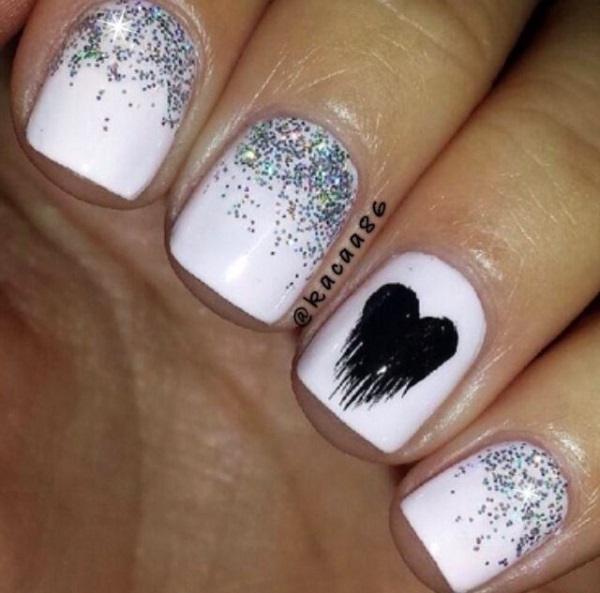
White and silver glitter polish Ombre nail art design. Make your plain white base coat look amazing by adding silver glitter polish and a bleeding heart detail using black polish on top.

Violet and blue Ombre nail art. These two colors are always a great combination when it comes to Ombre since they complement each other in the middle and gives your nails a soft and feminine look.
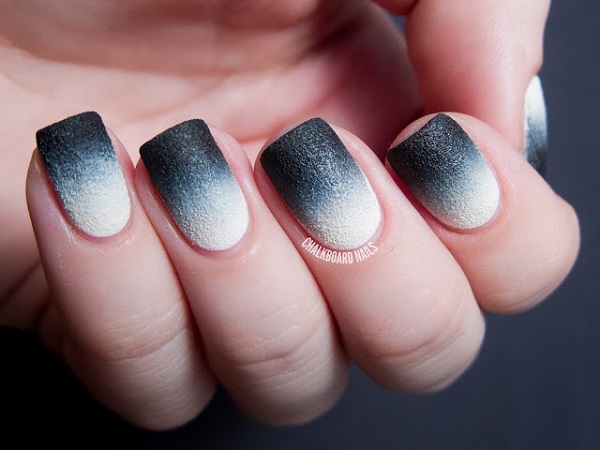
Frosted black and white Ombre nail art design. Make your Ombre style stand out by adding a frosted effect on the nail polish.
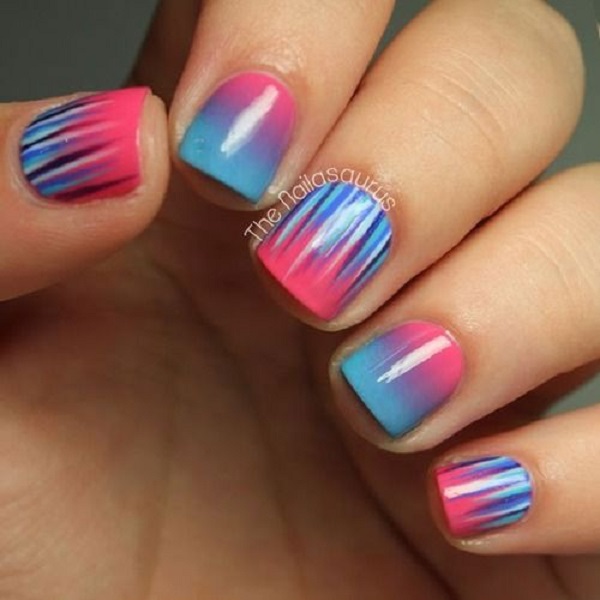
Pink and blue Ombre nail art combination. Creative a violet intersection between the two colors that makes it look amazing and add more details on top for effect.
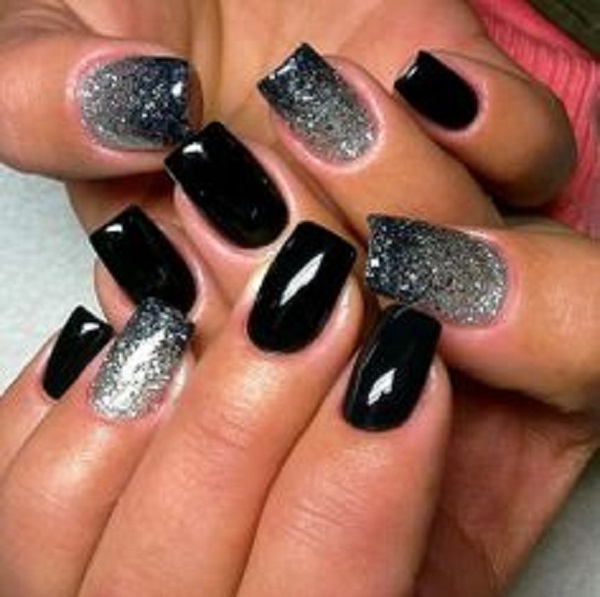
Black and silver Ombre nail art. This elegant nail art design consists of a matte black polish and silver glitter polish to enhance the Ombre effect on the nails.
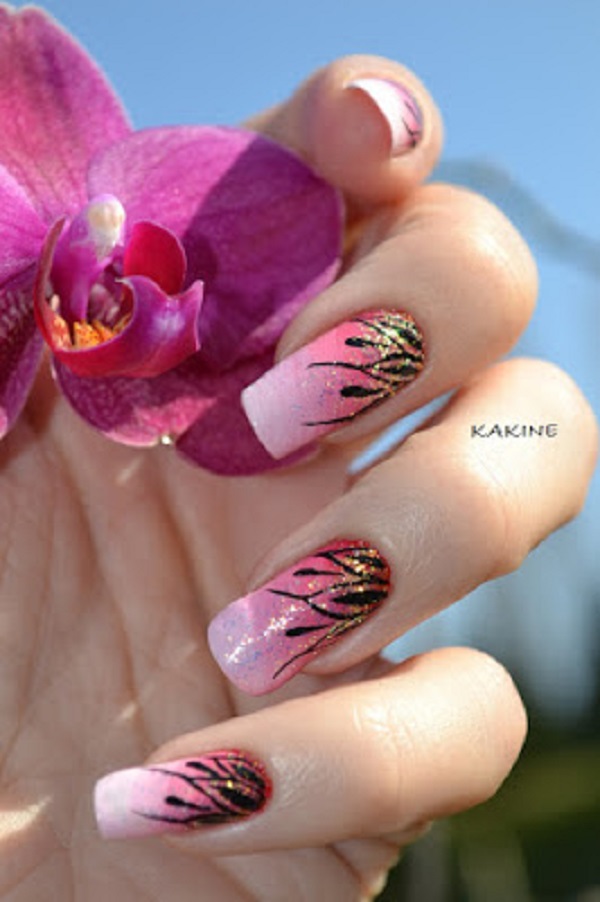
Beautiful carnation pink and baby pink Ombre nail art design with glitter polish. There’s nothing like highlighting your Ombre nails by adding glitter polish on top as well as petal details using black polish.

Orange and sliver glitter polish Ombre nail art. This is a simple Ombre design however it gives a look of vibrancy and freshness to your nails that absolutely looks lovely.
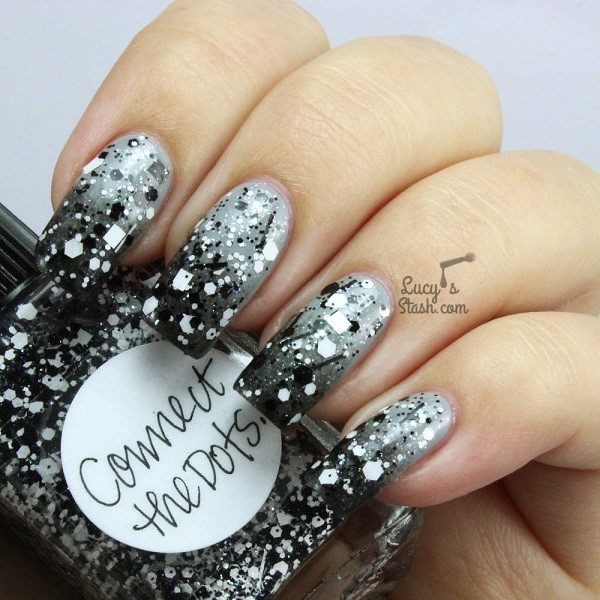
Gray and black Ombre with a twist. Give more life to your Ombre by adding silver sequins on top of the nails in varying sizes.

Fourth of July inspired Ombre nail art. A perfect nail art that comes with the flag colors and stars using Ombre style that highlights each nail.
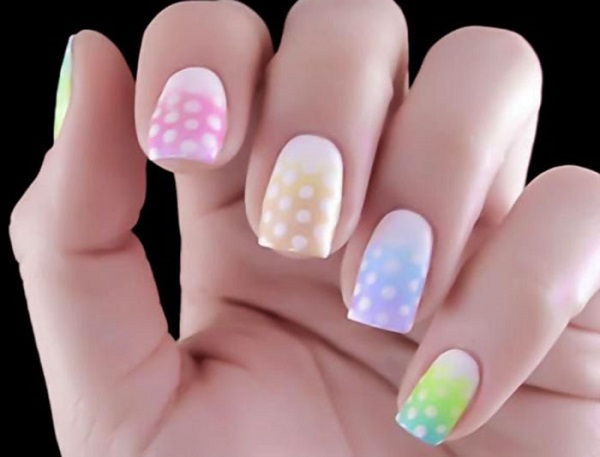
Sweet polka dots Ombre nail art design. Using baby colors such as pink, green, blue and orange, combine them into soft Ombre styles and add white polka dots on top for effect.

Sassy looking v-shaped Ombre nail art. Using dark colors such as black, violet and periwinkle, this nail art design gives your nails a string impression.

Sweet melon and pink Ombre nail art. Take the cuteness into another level by adding glitter and sequins unto your melon and pink color combination.
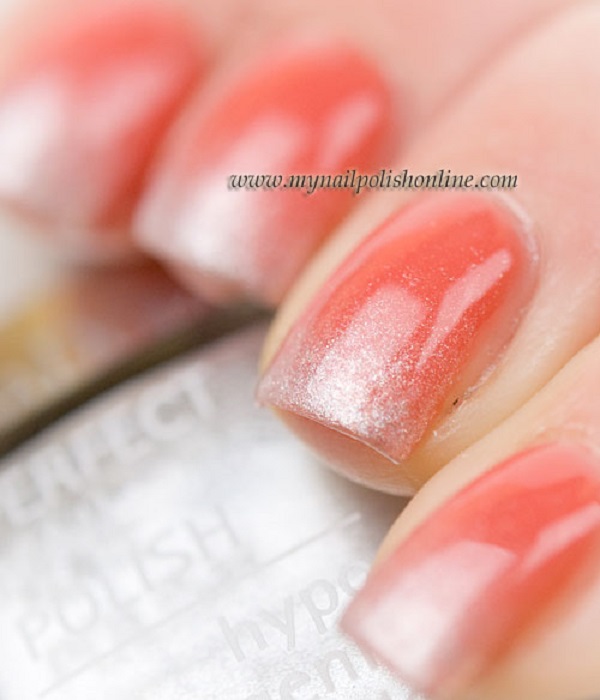
Beautiful melon colored Ombre nail art. You can use glitter polish to combine as an Ombre to your melon polish and produce this mild and pretty nail art.

Pastel inspired Ombre nail art. Paint your nails in pretty and bright pastel colors; add glitters on top to make them stand out even more.
Check out this wonderful combination of green and white Ombre nail art. Golden silhouettes of flower petals painted on top in glitter polish helps highlight the Ombre design.
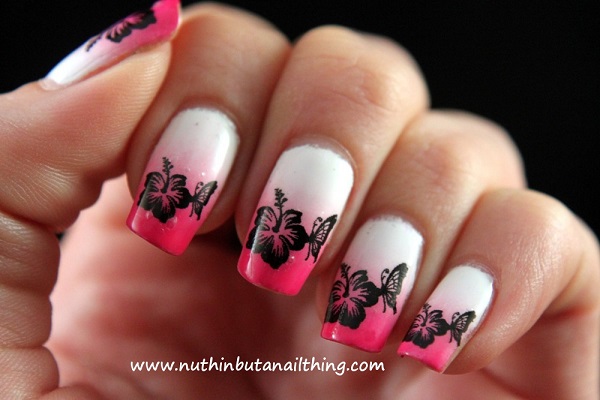
White and pink floral Ombre nail art design. A very simple yet beautiful looking Ombre nail art combination with floral silhouettes painted in black polish.
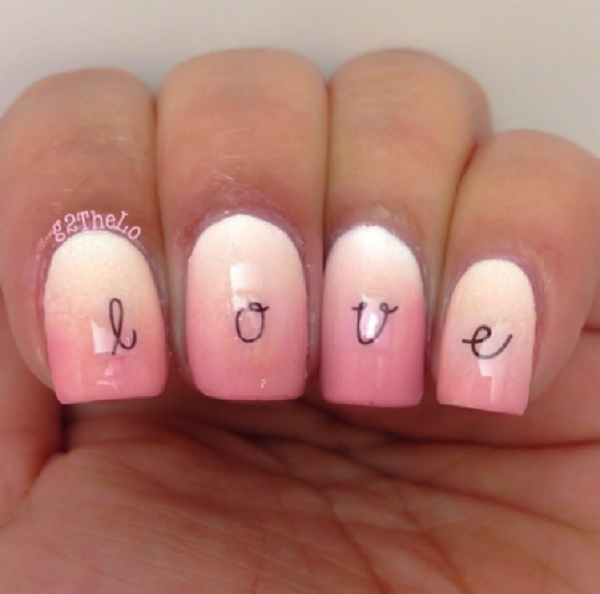
Light pink and white Ombre nail art design. A rather pretty looking nail art design with the addition of the words love on top of the Ombre for more effect.

Blue and violet glitter polish arranged as Ombre French tips. Be creative with your Ombre nails and transform them into pretty glittering French tips.

Tribal inspired Ombre nail art. Combine rainbow colors for your Ombre nail art and highlight them by using bold black lines to create tribal designs on top.

Fantastic and colorful Ombre glitter nail art. Put together your favorite colors into beautiful Ombre combinations and don’t forget to add sprinkled of glitter on top for effect.
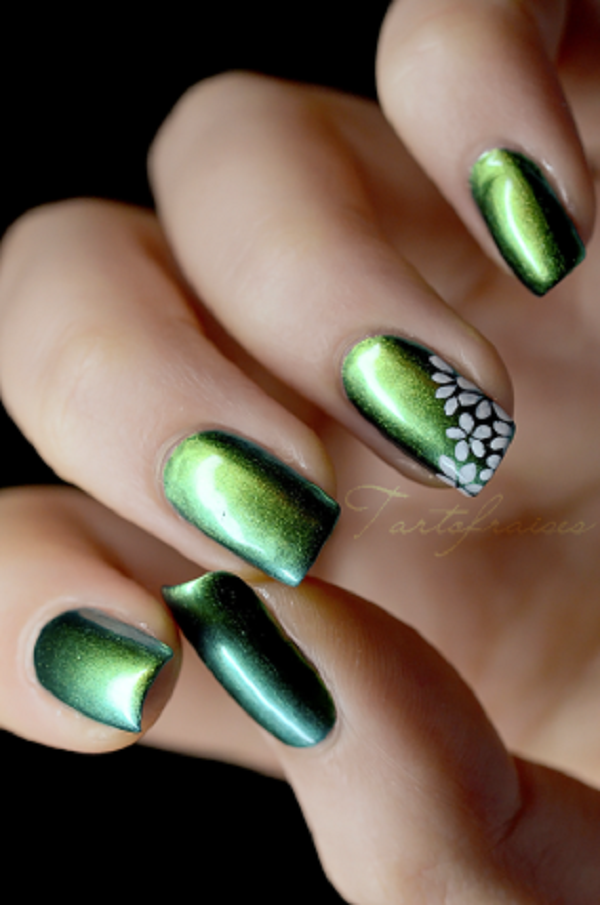
Green and black Ombre nail art. Give a mysterious tint to your nails by adding glitters and flora details on top using white nail polish.
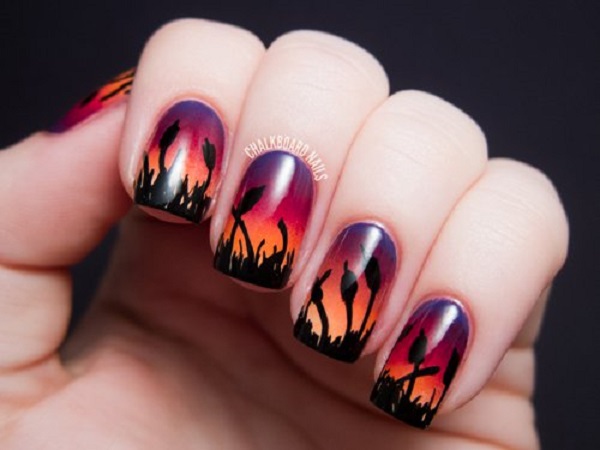
A sunset themed Ombre nail art design. The silhouettes of the flowers in black nail polish work well with the Ombre background which give your nails a certain depth and perspective.

Beach themed Ombre nail art design. Make the sea waves come alive with help from Ombre designs. Add more details to your theme by painting on glitter gold polish for grass and starfish details on top.

Simple but pretty violet Ombre nail art design. Choose complementing violet colors for this design and add silver glitter to highlight the darker tips of the nails.
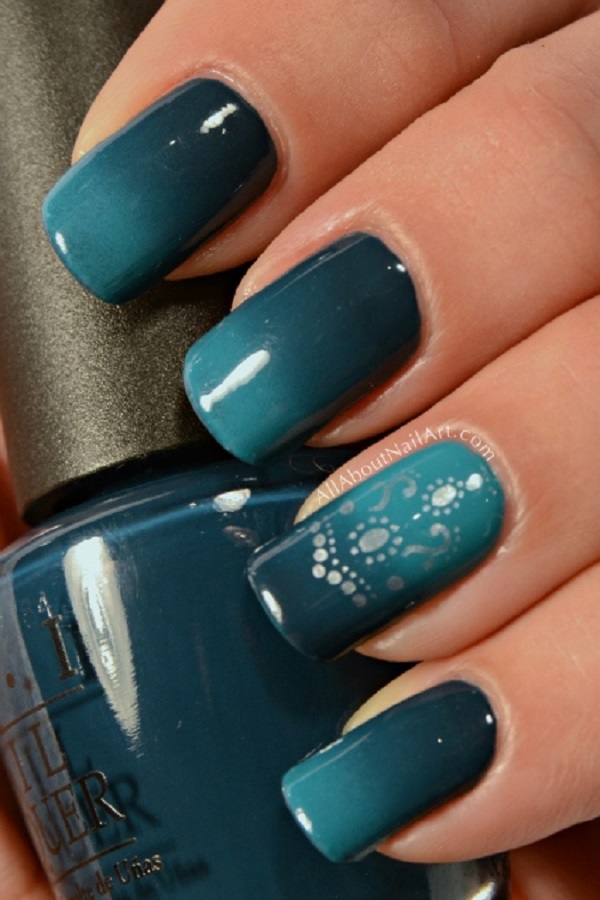
Dark green and blue green Ombre nail art. Step up your Ombre nail art game by adding silver designs on top of your color combination; it will look sophisticated and elegant at the same time.
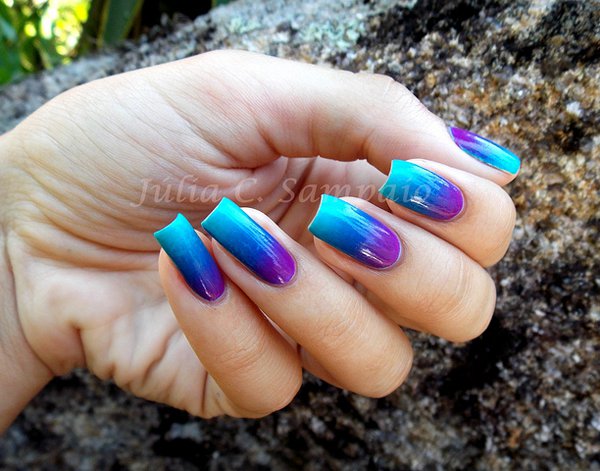
Green blue and violet Ombre nail art design. This galaxy inspired color combination looks simply stunning and amazing and can go with almost any of your outfits.

Cute cartoon themed Ombre nail art design. Combine your Ombre nails with your favorite cartoon or movie character and add thin details with black nail polish for effect.
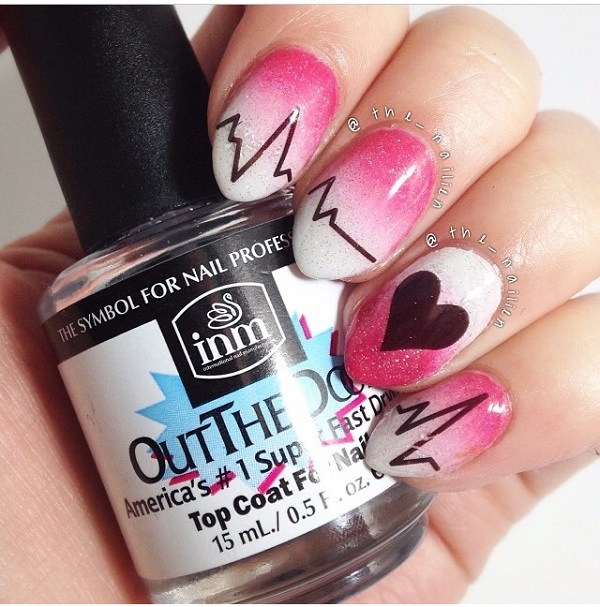
Pink heartbeat Ombre nail art design. A chic and cool looking Ombre design in pink and white combination with heartbeat details drawn in dark brown polish.
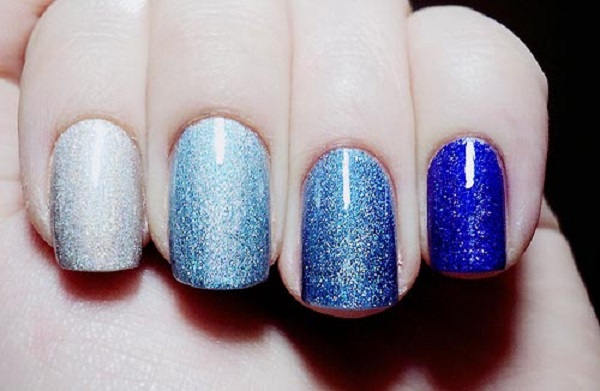
Blue hues Ombre nail art designs. Give a twist to your blue hues with glitter polish. Not only will it give another look to the Ombre design but it also makes each nail stand out on its own.

Silver and white Ombre nail art design. If you want to go simple and classic then this nail art design fits you well. The glitter adds to the sophistication of the nails.

Clear coat Ombre nail art design with pink glitter polish. A neat and tidy nail art design that plays around with the Ombre concept.
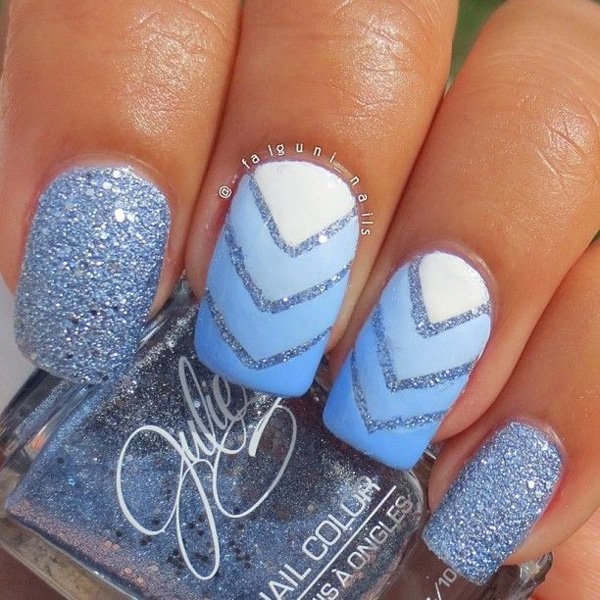
Sky blue and white Ombre nail art design. Additional glitter polish in metallic blue is added to give more effect to the Ombre.
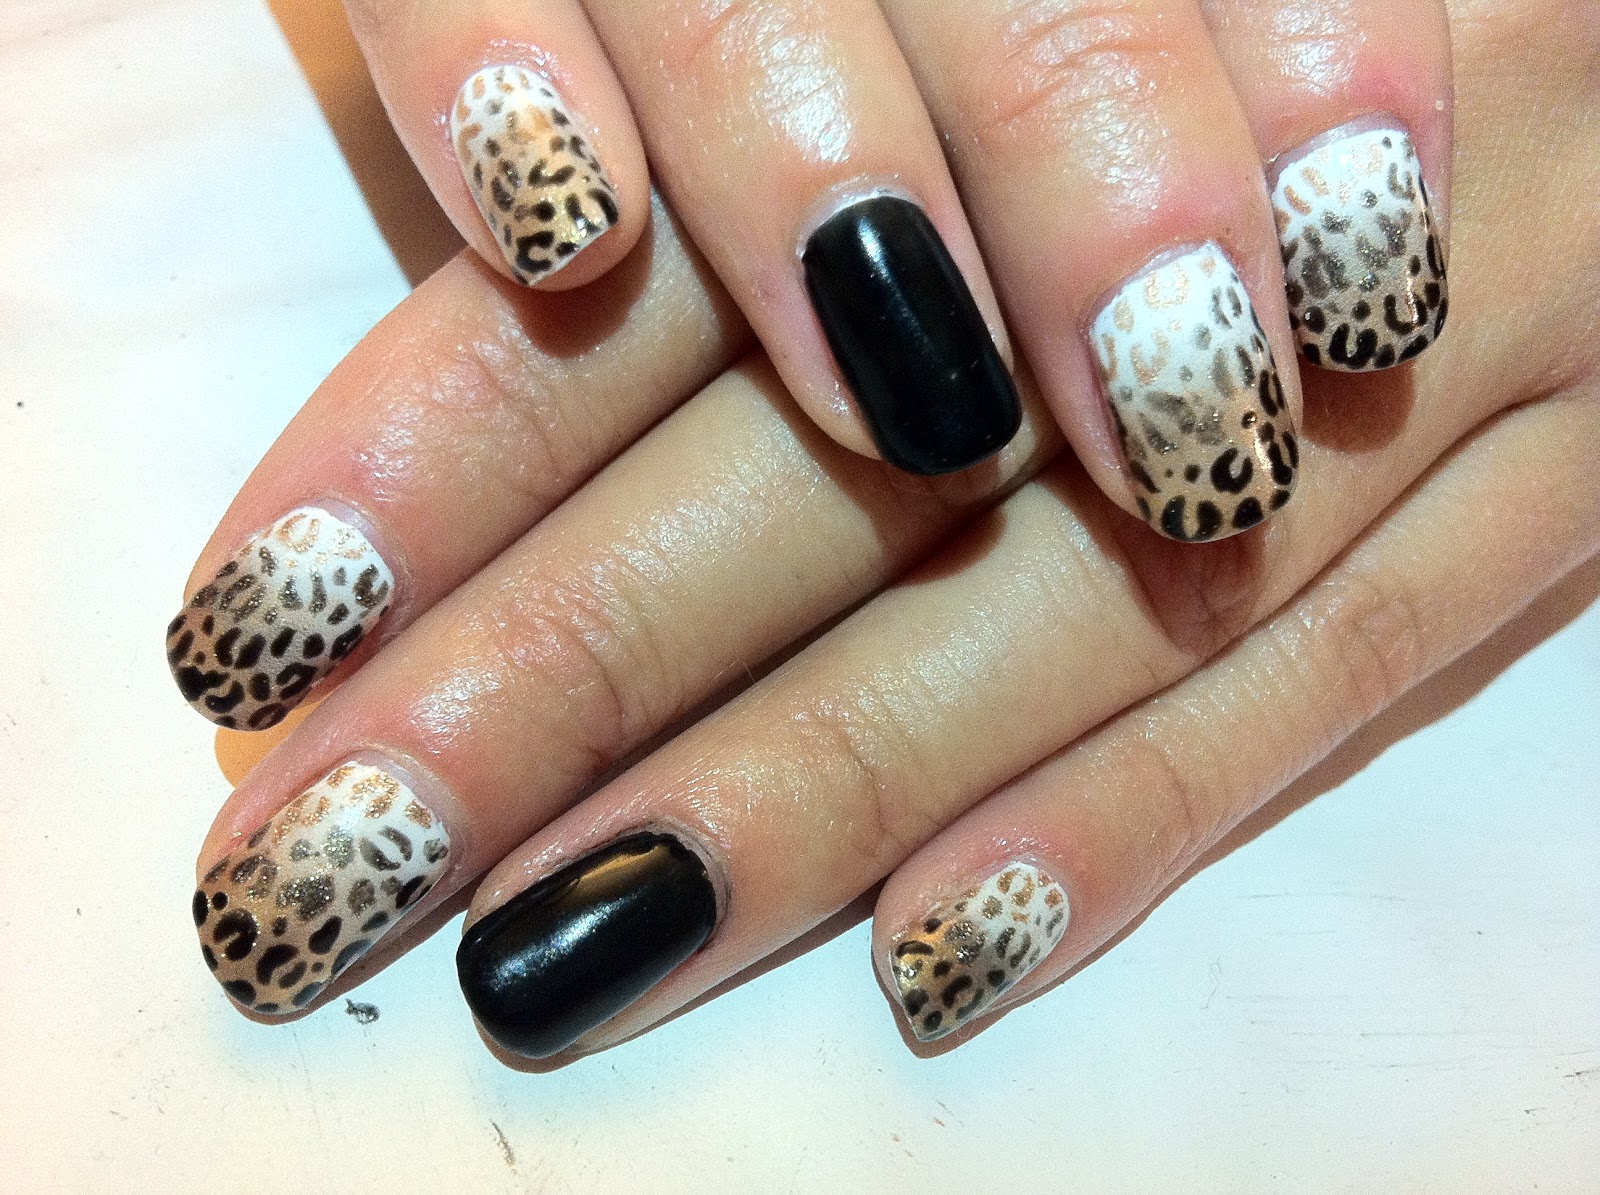
Leopard print Ombre nail art design. As if leopard prints weren’t catchy enough this wonderful design adds Ombre into the mix with glitter polish for a truly sassy effect.

Rainbow kissed Ombre nail art design. Why not incorporate all the colors into your nails right? This cute little number just does it right.

Clear coat and green glitter polish Ombre nail art design. The simplicity of this design makes the Ombre stand out more along with the help of the glitters.

Cute and adorable white glitter Ombre nails. Probably a great choice when going to weddings or engagement parties where you can dress in frilly clothes and just have your nails done elegantly.

Emerald colored Ombre nail art with leaves as accent. A wonderful and magical looking nail art design that makes use of green hues and leaf designs to make a truly astounding forest effect.

Beach inspired Ombre nail art design with a cute crab. You can do a lot with your Ombre nails especially with beach themes since you can add gold glitter as sand as well as paint on cute details such as sand crabs.
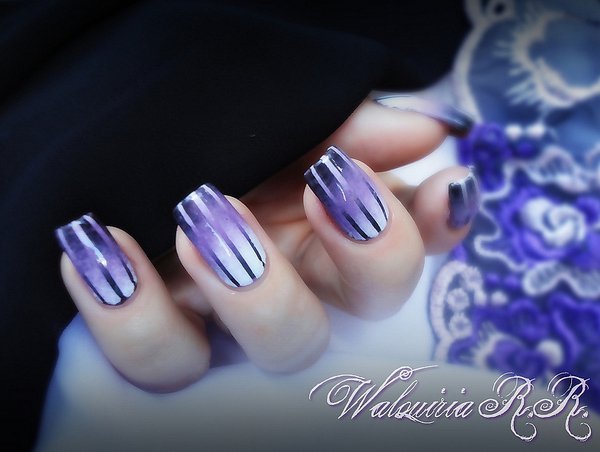
Majestic looking black, violet and silver Ombre nail art design. Silver metallic stripes were also added to make the nail even more glamorous.
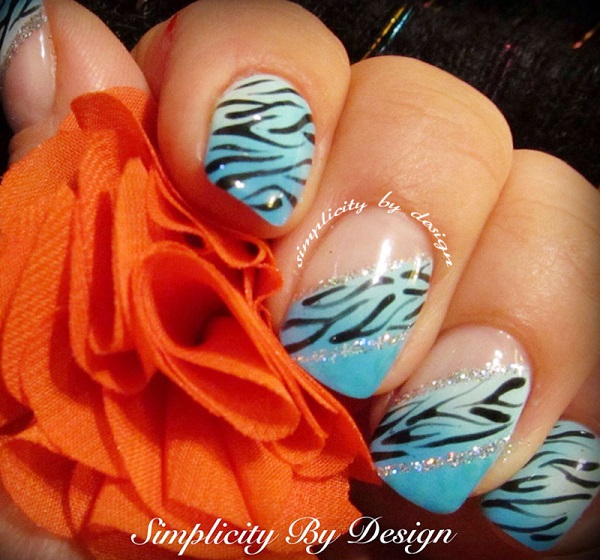
Animal prints Ombre nail art design. The great thing about animal print designs is that you can incorporate just about any other design with it and it will look twice as good.

Mystifying blue and white v nail art design. Make your nails look like they are made out of the mist with this enchanting combination added with black sequins on top for effect.

Blue and clear coat Ombre nail art design. This combination looks absolutely out of this world, with the white polka dots giving highlight to the Ombre design.

Another beach inspired Ombre nail art design that absolutely looks gorgeous. Paint your nails in beach colors like blue, gold and red to truly capture the calm and relaxing aura of a beach.

Sophisticated looking Ombre nail art design in violet and black polish. Stand out with nail art designs that can truly be striking from afar.
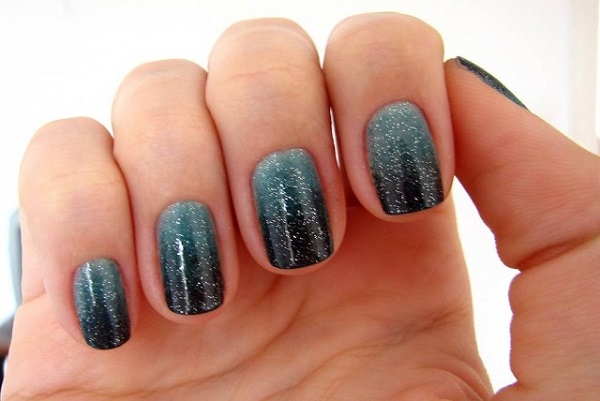
Black and dark green Ombre nail art design with glitters. When dark colors are used as Ombre it’s usually a good idea to lighten up the combination with silver glitter polish.
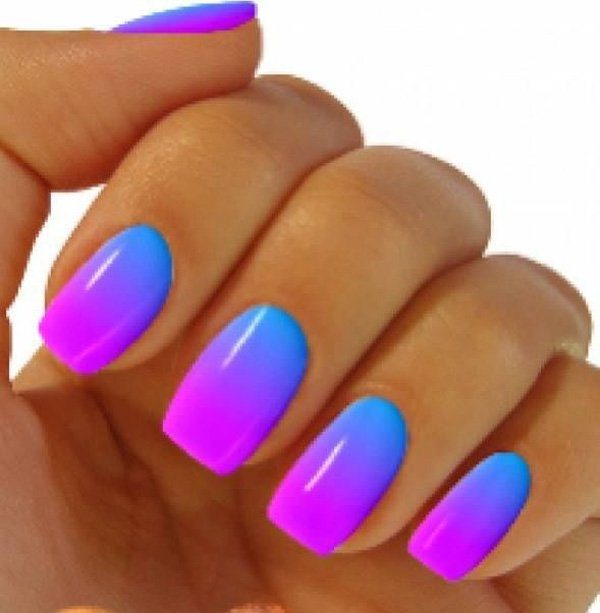
Bright colored red violet and blue Ombre nail art design. Give out that vibrant vibe with help from neon colors such as this combination.

Rainbow glitter polish Ombre nail art. Black doesn’t always dull your nails out; it can highlight some designs as well just like this rainbow colored glitter polish on top.
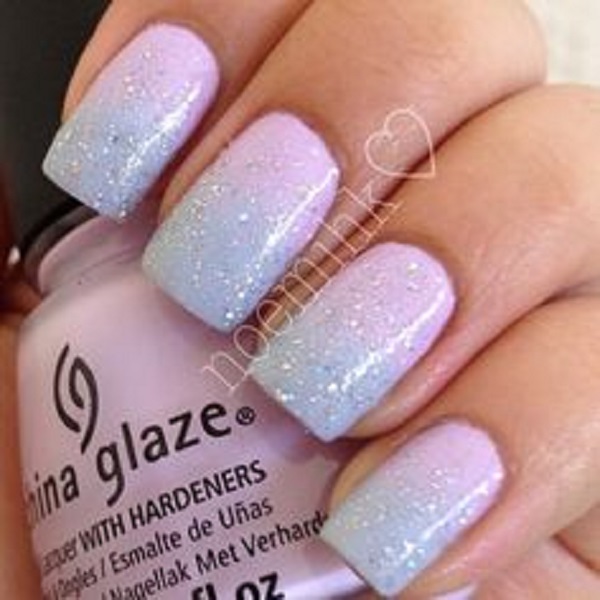
Cute and sassy looking baby pink and blue Ombre nail art. Add glitter polish on top to highlight the combination and give life to the overall design.

Look sophisticated with this violet and periwinkle Ombre nail art design. It looks smooth and clean yet gives you a strong impression.

Candy colored Ombre nail art design. Combine light colors such as melon, yellow and green and form this adorable color combination.
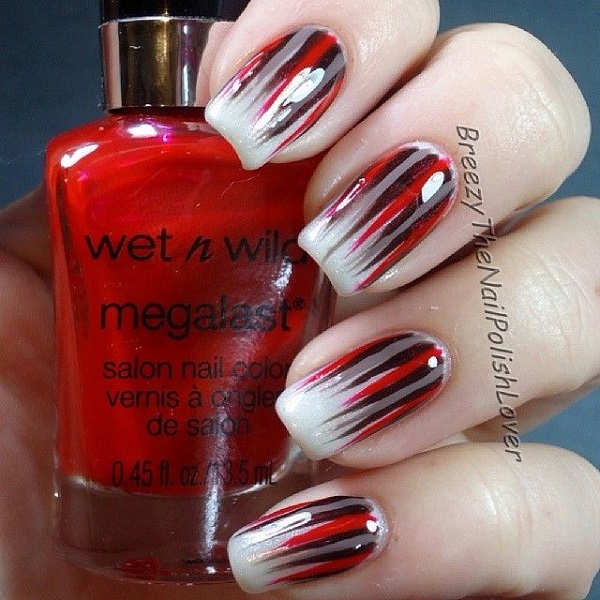
Let your nails give a statement with this powerful Ombre nail art design. Combine strong colors such as black, red and silver with frosted white tips to give out the perfect effect.
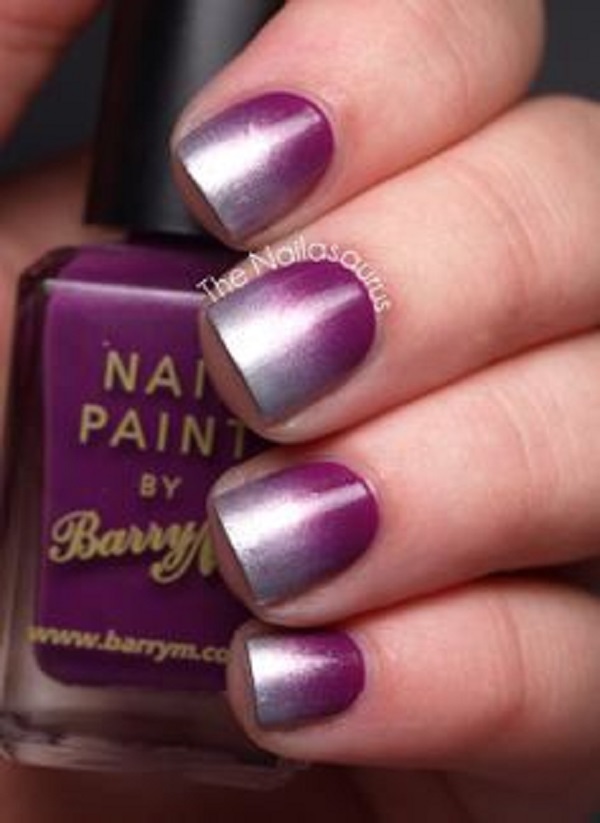
Purple and silver Ombre nail art design. A great looking nail art design for short nails that’s simple yet elegant at the same time.

