
Beautiful butterflies at the tips of your fingers
Easily one of the prettiest nail art designs would be the butterfly nails. They look absolutely stunning and can effectively give the nails a wonderful look! The best thing about this is that it isn’t as hard to paint as it looks.
Make your own butterfly nail art now!
All you need are a few simple and usual nail art tools. There’s no need to buy expensive tools if you can also customize your own at home. There are plenty of designs online that you can look up to follow, but you can also make one on your own. You can also combine ideas that you see from references and recreate them to something that can represent you to impose a sense of personalizing into the nail art design.
However if you’re new to painting the butterfly and is unsure of what to do, you can try out the basic butterfly nil art design first. Get familiar with the design and which look best on your nails, then you can start tweaking the designs and making them more personalized or close to your taste. The best thing about nail art is you can make it your own and make it unique from the rest of similar concepts.
For starters you can try out the butterfly wing design. It is simple yet very beautiful to look at. This is also best for those who are unconfident of creating both butterfly wings for the first time. The one side of the wing gives you more freedom of expression and design without worrying about recreating the exact same copy on the other wing.
- Things you will need:
- A base coat
- Clear coat
- Nail polish colors for the design (you can use three or more depending on the look you need. You can play around with magnetic and glitter polish for this design as well)
- Magnet
- Magnetic polish
- Dotting tool or toothpick
- Art brush or nail polish brush
Start off by coating your nails with the base coat. The base coat is important because it protects your nails from the layers of nail polish to be added above. Also make sure that the nails are well cleaned before applying the design. This is to help prevent any irregular color leaks that might damage or disrupt the design. Also be sure that the base coat is dry before applying layers on top of it, two coatings of the base coat will do the trick.
You can then use one of your magnetic polishes. Magnetic polishes are great for stripes and such because they stretch out without you to meticulously trace them into a straight line. However you can still use any polish that makes you feel comfortable. Use any color lighter than your base color or darker. Design them as diagonal stripes on your nails and let the magnetic polish sit for ten seconds with the magnet over it. Try to adjust where you position the magnet to get the polish to go to the desired directions. This can also depend on what instruction the magnetic polish has on.
When the magnetic polish has settled and dried, take up a darker regular polish, preferably black for the outline of the butterfly wing. You may need a thinner brush to create the outline for precision. Start by creating a small arc at the lower base of your nails. The arc should start from the middle of the base towards the side of the nails; you can choose whether it will be on the left or right side.
Once that is done proceed by creating petal like curves from the outer end of the arc. This will serve as the line design of the wing. The end result should look like a side of a flower petal. When you have finished maybe three or four curves; it depends on how many can fit into the nail, paint the outer side (or tip) of your nails where the curves leave spaces. When done correctly you can now see a simple wing outline.
Take your glitter polish and add glitter inside the first arc that you have painted, the one from the corner of your nails to the sides. This will help accentuate the base of the nail and also looks glamorous at the same time.
Then take a lighter colored polish and put polka dots on the tip of your nails where you filled the space with black polish. White would be a great combination for this but you can also play along and use other colors as well as glitter paint. It would depend on your preference. You will be using your dotted tool for this or a toothpick if you don’t have one.
When done make sure that the layers are completely dry and add your top clear coat. The clear coat helps save the design and keeps the nail art intact for a longer time. It also helps protect the design from outside forces such as the air or water. Clear coats also help make the design look shiny and clean.
A tricky thing would be putting the same design on the other hand. You may want to adjust your hands and place them on a flat surface to ensure that the curves would look all right. For the magnetic polish instead of the moving the magnet, you can move your hands instead. Move the hand that you have more control of since this will be much easier for you to finish the design. You can go with other different types of polishes and designs as well like sandwich or gradient designs to accentuate your nails.
And you are done!
Don’t be afraid to experiment on your nails and to see which design goes best with the polishes that you have available or your capability in painting nail art. What’s important is you are able to do the design as neatly and as symmetrical to the other side as possible, except when you are going for the abstract type of design wherein=in one nail is unique from the other.
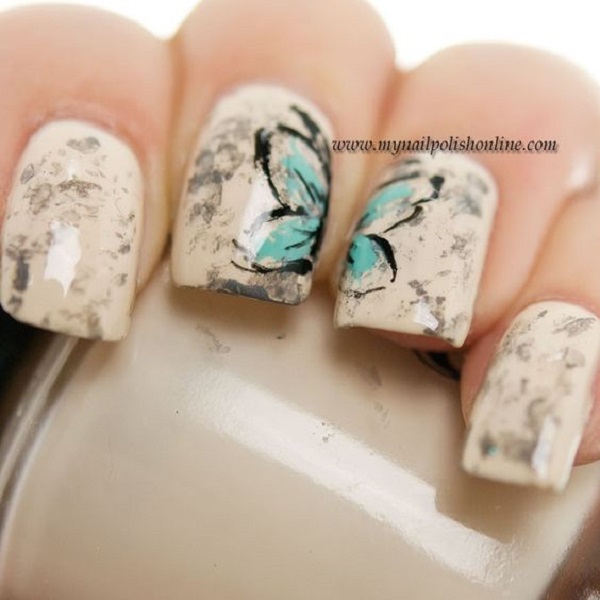
Beautiful marble inspired butterfly nail art. The base of the nails is coated in cream and gray colors depicting a marble like design, as a pair of butterfly wings are painted on either side of the nails as they meet together in the middle.

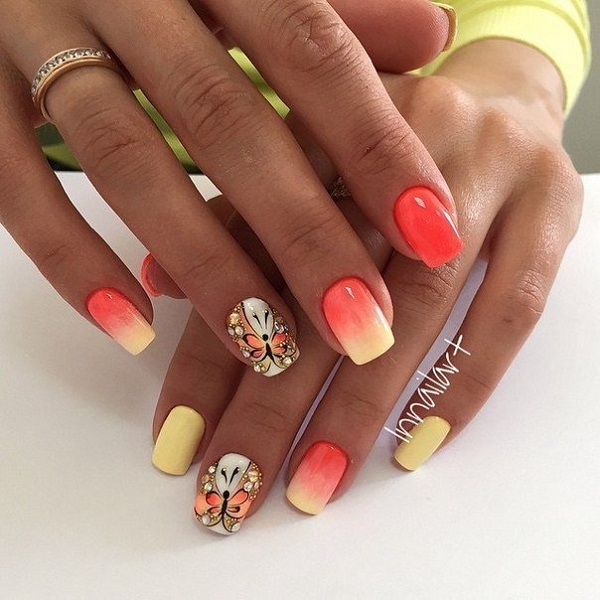
A refreshing butterfly nail art design with French tip. The bright red and yellow colors lighten up the design as the butterfly looks as if it is glowing and hopping over from one nail on to another.

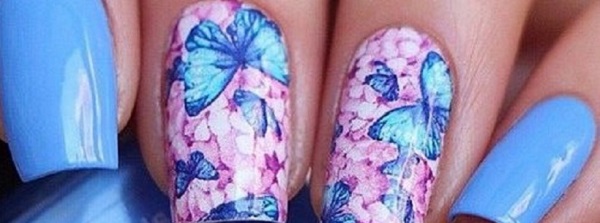
Cute looking pink and white butterflies nail art. This simple yet eye-catching nail art design is perfect for those who want a minimalist effect but also a clean look on the nails.

Wonderful looking butterfly nail art design in and French tips. The white French tips make the design look elegant and the pink butterfly on top of the pure white background accentuates it even more.
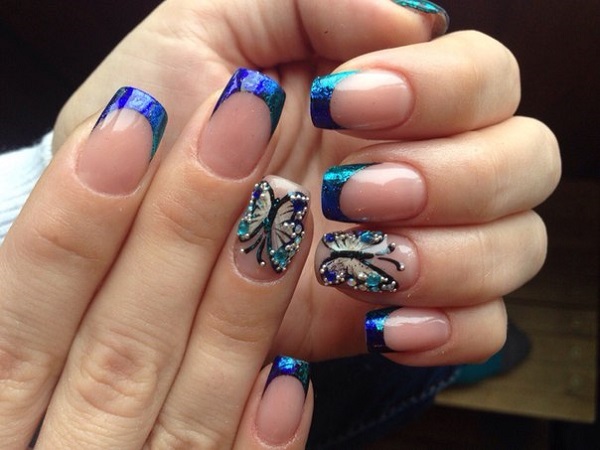
Magical looking butterfly nail art in mystic blue color. The glitter effect on the blue polish accentuates the nails and makes the French tips glow. The bedazzled butterfly embellishments on top are also gorgeous.
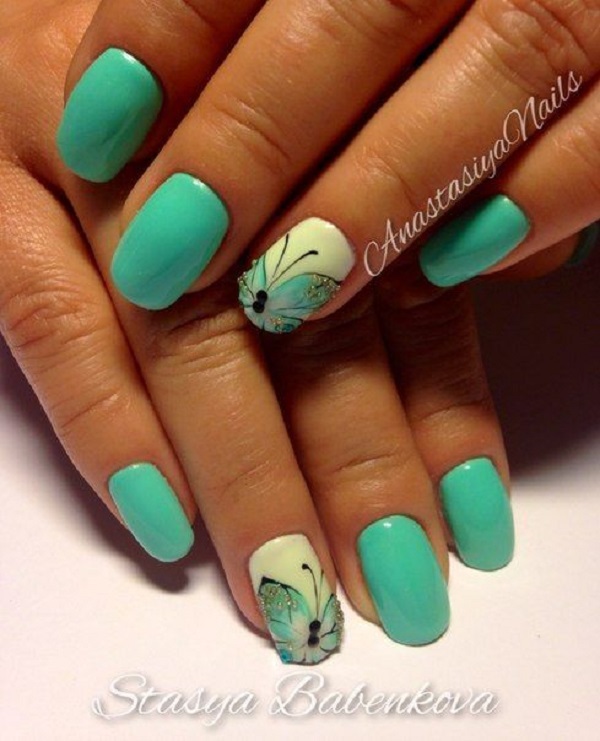
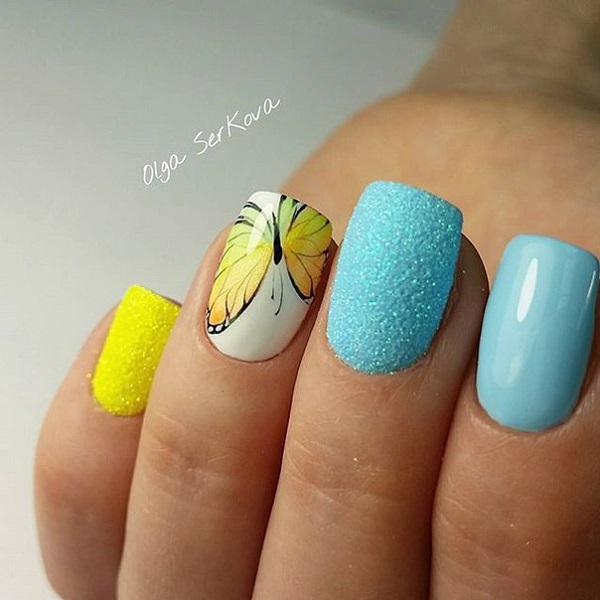
Simple and beautiful turquoise blue themed butterfly nail art. The butterfly wings are cleverly designed to fit the tips of the nails.
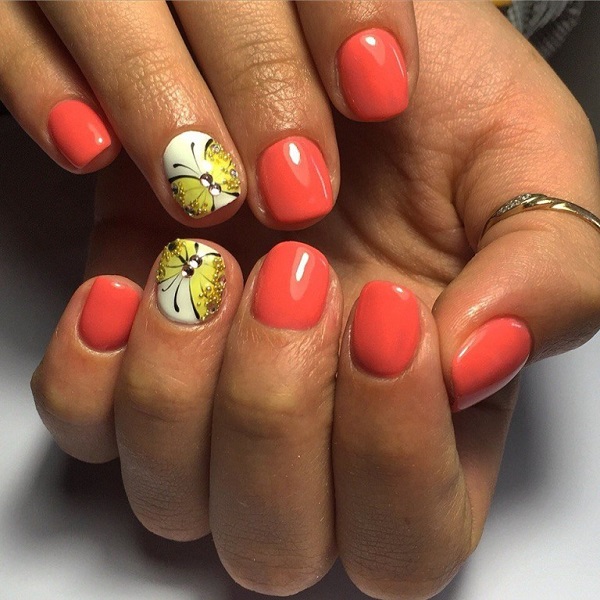
Beautiful melon themed butterfly nail art. The French tips are in melon polish and the butterfly is painted covering the entire nail on top of a clear polish.
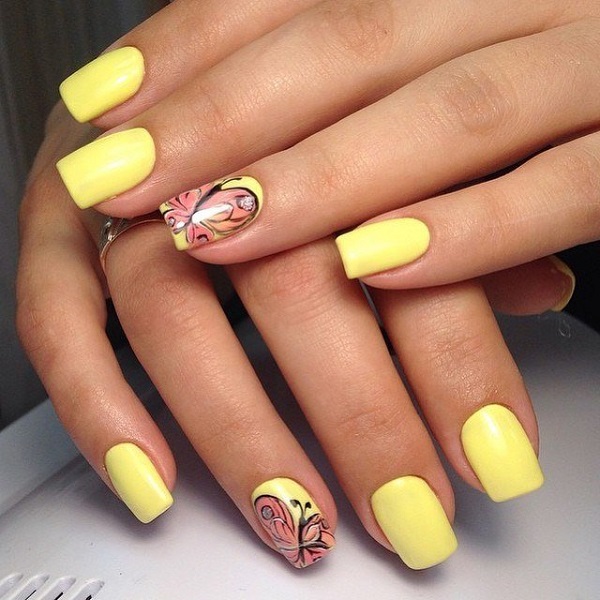
Really cute and simple butterflies nail art. The pale yellow base color helps highlight the colorful butterfly design on top that spans its wings covering the entire nail.
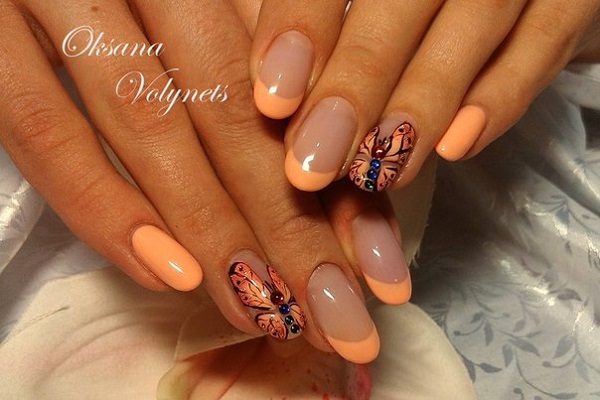
Wonderful looking butterfly nail art for short nails. The peach color compliments the yellow and white combination of the butterfly design and its background and helps highlight it.

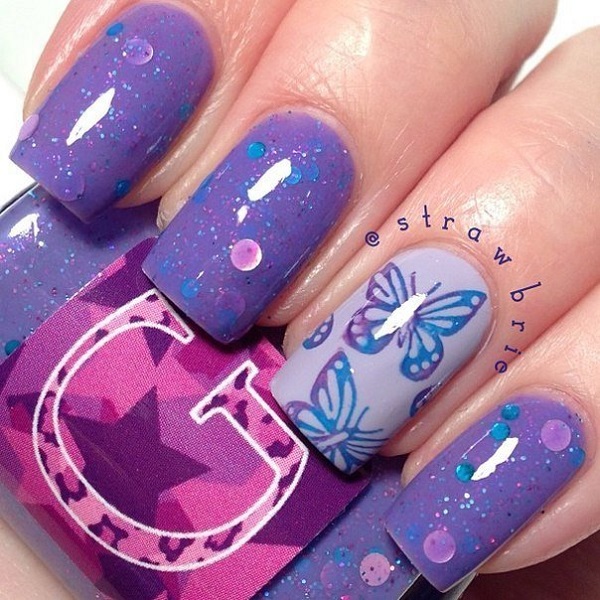
Enthralling butterfly nail art. The light blue colors of the design make the butterflies look magical and mystical the purple background also help emphasize the butterflies painted above it.

Colorful butterfly nail art. A minimalist inspired nail art design in cute pastel colors and simple butterfly designs.

A French tip inspired butterfly nail art design. The baby blue colors make wonders with making the French tip design look simple and clean, the small and big butterflies painted on top also make good accents to the design.

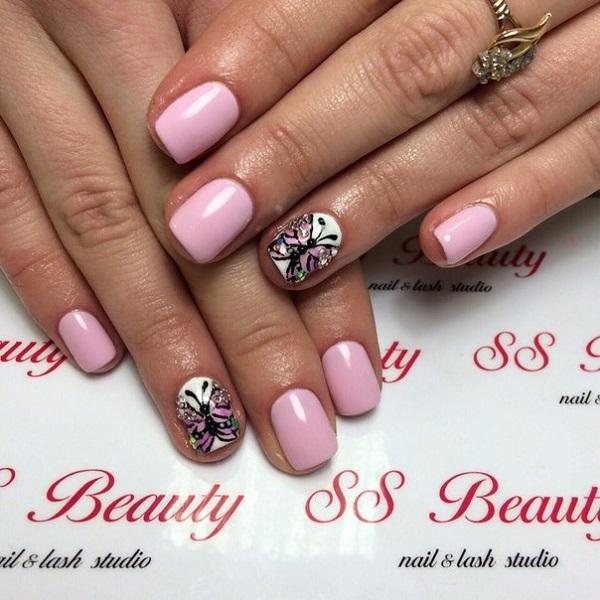
Pink and glitter polish themed butterfly nail art. Adding glitter to the design absolutely made this look amazing and the protruding effect of the butterflies also make it look like they are alive and flying away which is adorable.

Simple but gorgeous looking butterfly nail art design. The olive themed nail art works perfectly with the white theme of the lace designs as well as the white butterfly embellishment on top.

Beautiful gradient themed butterfly nail art design. The soft gradients of purple and blue make a beautiful compliment with the butterfly outlined in black polish with silver beads on top.

Ravenous blue butterfly nail art design. The fierce looking design is absolutely amazing as it looks powerful in electric blue polish with the contrasting white background to highlight the butterfly design.
Summer themed butterfly nail art. The bright colors of the polish make it very pleasing to the eyes and their combination highly complements each other. The yellow butterfly detail also looks perfect against the white background.

White, blue and purple themed butterfly nail art design. Simple beautiful and pleasant to the eyes. The aesthetics of the design is wonderful and you can just look at the butterfly wings and the bashful background designs and never get tired of them.

Matte inspired butterfly nail art. The matte pastel colors n the nails look absolutely stunning and the protruding white butterfly outline also makes it look more elegant. The embellishments on top do a great job of accentuating the nails
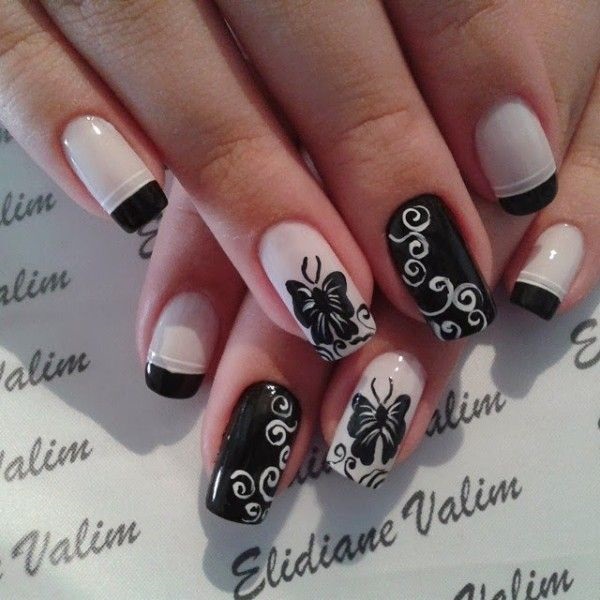
Black and white themed butterfly nail art design. Stunning and quirky looking. Truly a butterfly nail art design that stands out and makes a statement because of how artistic the butterfly outlines curves are painted in contrasting colors.

Wonderful looking blue green themed butterfly nail art design. The French tips in this color look beautiful and the single butterfly hovering about the tips of the nails look magnificent.

Purple and yellow themed butterfly nail art design. The gradient designs coupled with embellishments help accentuate the nails and the butterfly design altogether.
Pink and white themed butterfly nail art design. A wonderful pastel inspired design where the butterfly is multi-colored in contrast to the plain white background in order for it to stand out and look unique.
Sun kissed butterfly nail art design. Inspired by the bright colors of the sun, the yellow and melon combination is simply perfect in gradient with the butterfly outline in the same color combination.

Simple yet wonderful looking butterfly nail art design. The pink glitter polish and French tips look perfect as a butterfly outline is drawn in black polish on top with silver beads on its back.
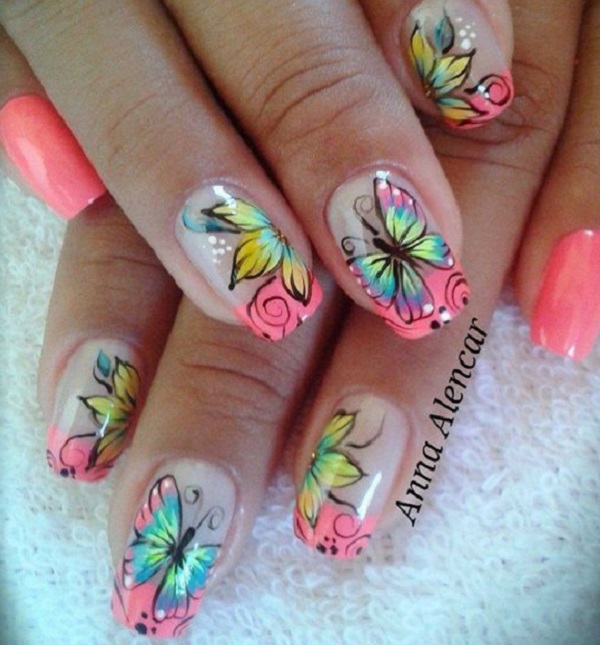
A fully multi colored butterfly nail art design. An explosion of colors to the eyes, this design is simply breathtaking as the butterfly wings take the form of various color combinations.
Cute looking butterfly nail art design. The violet and purple combination look absolutely amazing and fun with the sandwich effect and sequins to highlight the nails.

Butterfly with musical notes nail art. The butterfly can be seen flying through the nails and leaving a musical trail. The purple and blue combination are simply perfect to highlight both the background and the butterfly designs.

Deep green themed butterfly nail art design. This design looks truly elegant as the deep green color is also in glitter and is joined with a contrasting black color to make it pop out more. The white polka dot designs also do a great job in highlighting the tips of the nails.

Really cute looking butterfly nail art design. The pink and blue colors of the nails art design are simply amazing as the butterfly design on top is further highlighted and looks very lively.