In this tutorial, we’ll take a quick look at how to use patterns as fills in graphic design, whether you plan to use them for web design or for spicing up a project for postcard printing. The Layer Styles tool is one of the most effective tools in Photoshop for managing patterns. Using Layer Styles you can experiment with different styling options without overwriting the content in the layer. More specifically, I’ll teach you how to utilize the “pattern overlay” feature — a simple yet invaluable tool for creating visual motifs. The following is what we will be creating in this tutorial:
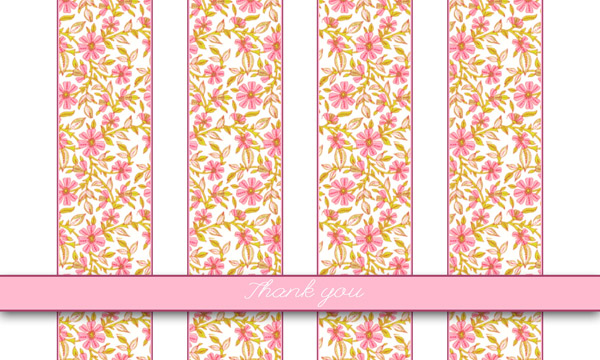
Do keep in mind, however, that you can follow along and easily use the steps to create a pattern unique to your own project. Let’s begin!
1. Finding a Pattern
You can use any pattern you’d like, but for this tutorial I’ll be using this one:
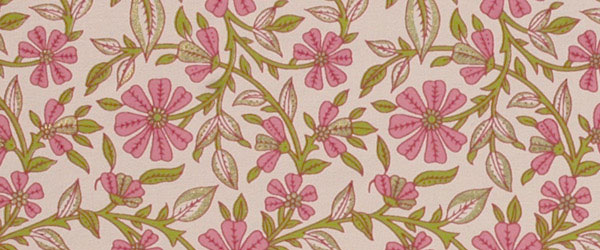
Once you have a pattern, import it into Photoshop. We’re going to create a pattern you can use and re-use in the Layer Styles.
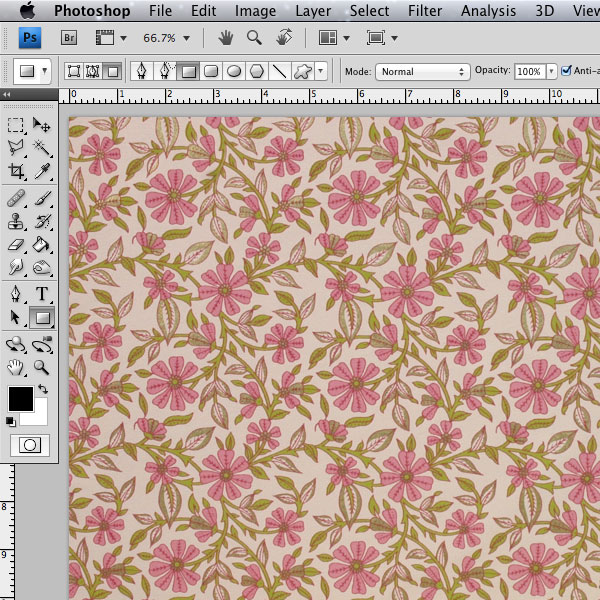
2. Editing the Pattern
Now that we have pulled it into Photoshop, I’m going to add a modifier layer to correct some colors. I’ll use the Curves tool found in the Image > Adjustments > Curves menu.
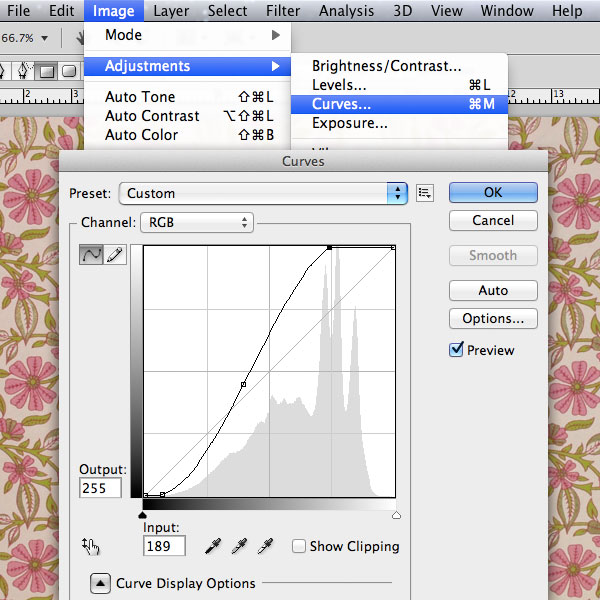

By pulling down the darks and boosting the highlights, we create more contrast and more vibrant colors. This isn’t necessary for creating patterns for use in the Layer Styles tool.
3. Defining the Pattern
In order to actually use the leafy pattern as a Photoshop pattern, we will need to tell Photoshop that it is a working pattern file. To do this we need to select a region of pixels within our document. The easiest way to do this is by using the Rectangular Marquee Tool. Press “M” on the keyboard or select the top-right tool from the tool menu. Click and drag to make a selection.
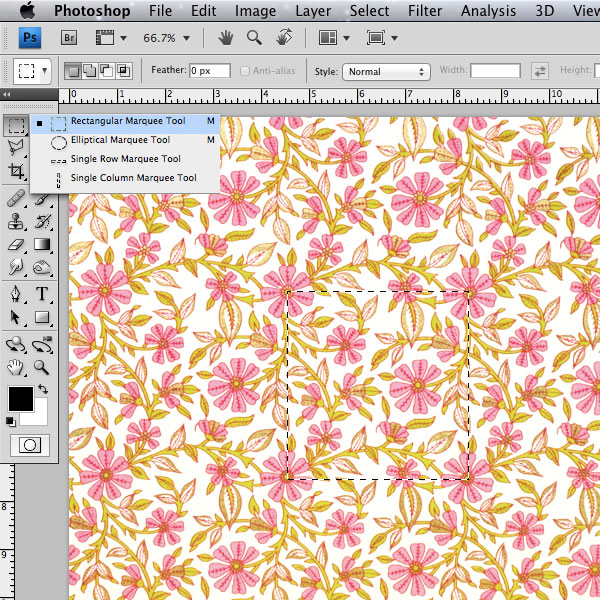
After getting your selection right, go to Edit > Define Pattern. This will bring up a dialogue box asking us to name our pattern. For obvious reasons, I’m calling this one Leafy Wallpaper, but feel free to be creative.
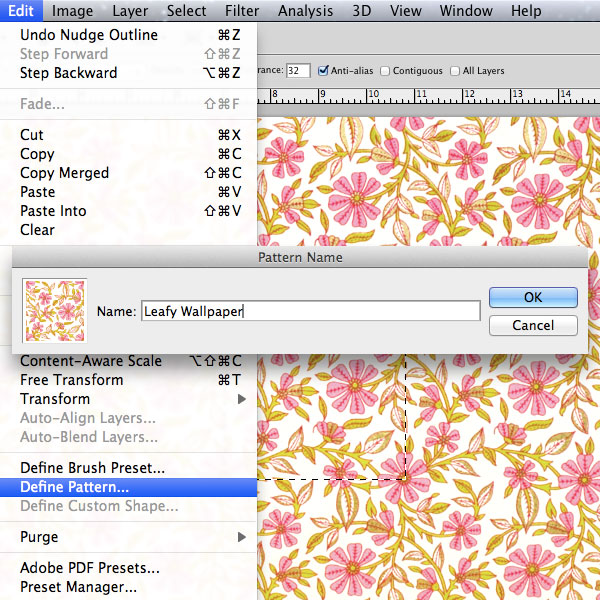
Advanced Tip: Since there are several ways to select a region of pixels, it becomes easy to define very specific patterns, but take into account that all of the selected region will be turned into a pattern. That being said, I only selected a general area of this pattern because I want it to repeat as such. Had I wanted parts of my pattern to be transparent, I could have deselected areas before defining the pattern or erased certain parts of the highlighted region.
4. Getting Familiar with Layer Styles
There are a few separate ways to access the Layer Styles tools:
- Layer > Layer Style > Pattern Overlay (or any other menu item under “Layer Style”)
- Double click to the right of the layer you wish to edit in the Layers window.
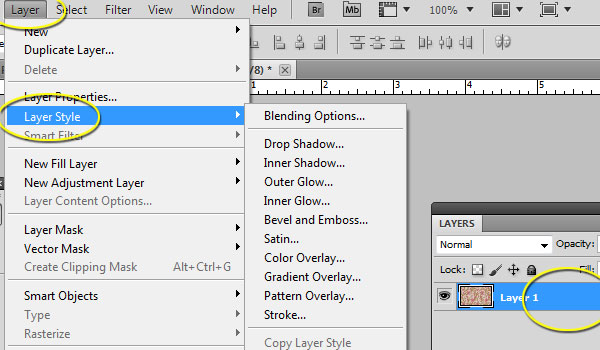
Now we should be all set to use our pattern in the Layer Styles palette which looks like this:
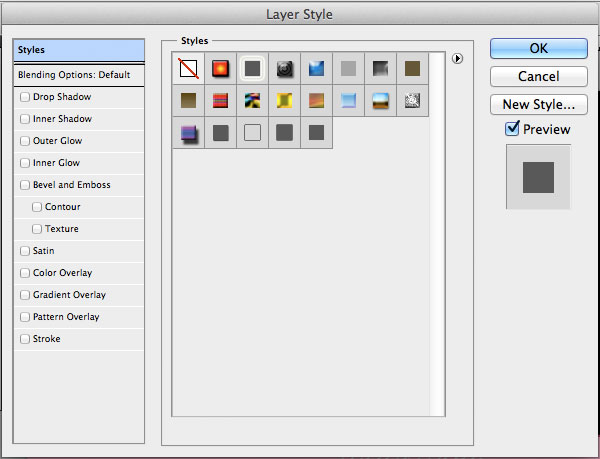
Notice the different styling options on the left. Also, observe that the check box next to that style must be checked “on” for the style to be put into effect. For this tutorial, we are only covering the options of the Pattern Overlay Style, so the only style I’ll be activating will be Pattern Overlay. You may find some of the other available styling options useful now that you know how to get to them, but for now lets stay focused.
5. Using the Pattern
From here, most of the settings are up to you and your creative eye. For this example, I’ll be using one of my own designs. Before this tutorial, I prepared a simple Thank-you card. We will be embellishing the simple design by adding our leafy wall paper design to the black columns in the background. Here’s a glance at the card so far:
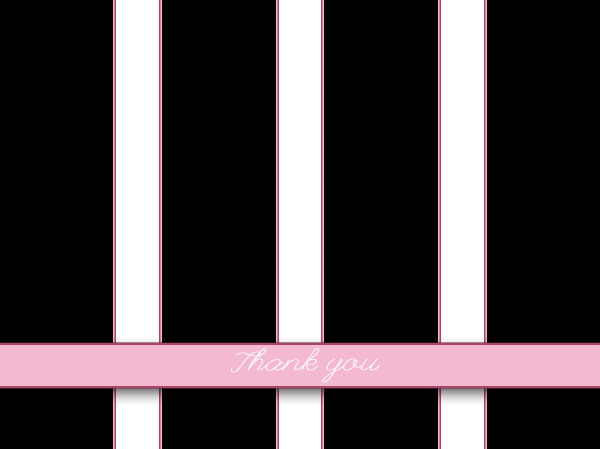
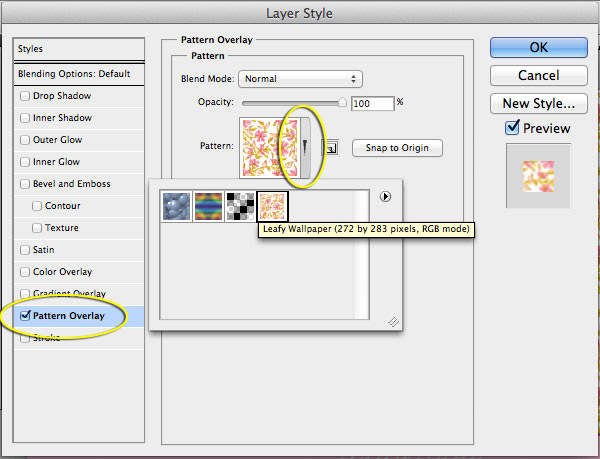
If you are using my files, select the “Floral Pattern” layer, navigate to the Layer Styles palette, and select Pattern Overlay. We will need to select our pattern from the pattern drop-down panel in order to edit it correctly. Simply click on the arrow next to the defaul pattern and select leafy wallpaper.
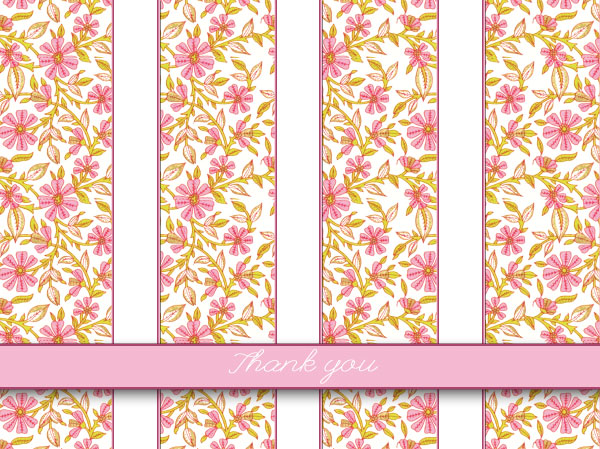
Here’s a glance of what we have so far:
5.2 Adjusting the Scale of the Pattern
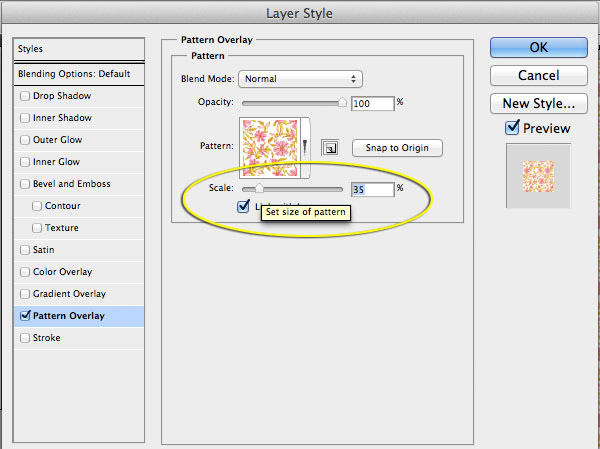
Already, you can see the pattern laying over the current fill area. If you can’t see the pattern, click the “Preview” check box on the right in the Layer Style window. By using the slider at the bottom of the palette labeled “Scale,” we can adjust the size of the pattern within that fill area.
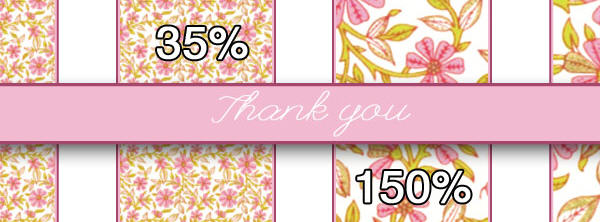
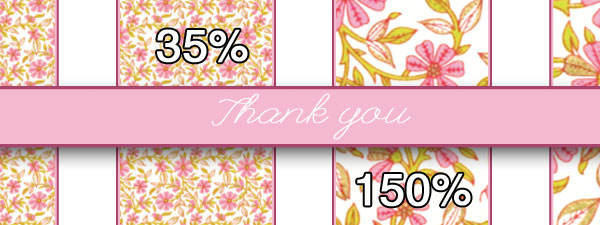
Here is an example of the pattern at both 35% (which is smaller than the original) and 150% (which is larger than the original). The larger size generates a more simplistic look while still portraying the sophistication of the leaf pattern. Smaller sizes of complex designs can create more complicated looking designs; a must have for meticulous artists.

This is a well-written article. It clearly lays out the steps. I’ll be filing this tutorial for near future use. Now I want to use the overlay feature more. I had no idea it was so sophisticated and handy.
@Nikki Minors – Glad you like the tutorial!
Thank you for this tutorial, gonna useful to utilize patterns in the work!
You’re welcome!
Nice Tutorial Tara, Thanks for sharing
Simon H
Web Design Dorset
Thanks! Glad you enjoyed it.