
The art of the Leaf inspired nail design
For women one of the things that can instantly make them feel beautiful and confident is if they have nails that are on point. There’s just something about newly manicured nails with awesome nail polish that makes you feel good about yourself, unlike other makeover projects, the nails are the part of the body which you will always see, thus you admire them more than maybe your hair or your make up that you can only see in the mirror. This is why women tend to appreciate something that they can see more often. Not only that but a beautiful nail art is also in with the trend, nowadays more and more designs have been created to soothe the nail polish thirst out there. Leaf nail art designs have recently risen through the trend
When it comes to leaf nail art, you can find a lot of great designs already. More and more people are trying new leaf designs to make it more in to the season or can have more styles combined into one unique nail art. One of the most popular seasons for the leaf nail art is on autumn where the main focus would be on the leaves. However, leaf nail art designs proved that they can be painted on anytime and on any seasons and that they can be easily customized.
Creating your own Leaf nail art design
Below is a simple way where you can recreate a marbled style leaf nail art design. Of course you can try your own leaf nail art design and you can also take inspiration from other designs. The one which will be instructed below is to create a leaf design on the nails that can give you the feel of fall or autumn. It’s simple, it doesn’t need any elaborate skills but just the right items as well as a bit f practice to get the perfect effect on your nails.
- Things that you will need:
- – Base coat
- – Yellow nail polish
- – Red nail polish
- – Black nail polish
- – Clean cloth or Q tip
- – Nail polish remover
- – Plastic sheets that have been crumpled or polythene
On to the nail painting
Start by painting your nails with the desired base coat. You can choose any color for the base coat. One of the most popular would be the white base coat because of how it can easily blend with the other colors that will be painted n top. In some cases others use clear coat if it’s needed for the design, the same goes with the black base coat. Paint two layers of base coat to be sure and let them dry before you add other layers on top.
After making sure that the base coat is dry add the yellow nail polish on tp. Also start applying a double coat of the polish. The double coat’s purpose is for the nail polish to not come off so easily. You would not want the first layers to fade as quickly as that would affect the entire design and you will end up redoing it.
When you are sure that the yellow polish is dry paint a very thin strip of the red polish on top. This layer doesn’t need to be double coated or painted as thick. A quick thin layer would do just fine.
Now it’s time to use the crumpled pieces of polythene. Dip it into the nails. You are then trying to take off a bit of color from the nail polish but just a little so that it will leave a marble like effect. When you are done with the first batch of marbles, put another thin layer of the red polish again on top and do the same thing with the polythene until you get the perfect look. To ensure that the nails still look neat and clean, use new crumpled polythene on each layer or nail so that the colors will not blend on the marble effect. If you need to do this one nail at a time then do so, what’s important is the outcome and always remember that it is not a contest of who finished the nail art design first; the outcome of the nails is what should dictate your pace.
Some of the other colors that you would be interested in using and would look good with the marbling effect would be gold, brown, green, orange and more. It would be up to you when you want to use more than one color in marbling, but if you are new to this style then using one spontaneous color would be highly recommended.
The finale of the nail art would be the leaves. You cans imply paint them on the marbled backdrop. In most cases a silhouette leaf nail art design looks best with a colorful background. Thus you should use black polish to draw the outline of the leaf on top. You can also use other colors such as in dark hues or in white depending on which color compliments the background nail polishes that you used for the marble effect.
Finishing the design
Just clean off the excess polish and coat the nails with a clear nail polish on top to preserve the design then you are done! Simple right? It will be much simpler and faster once you get used to painting it. Practice is the key and you can also experiment on other leaf nail art designs that you feel would suit best for you. There are plenty of inspiring nail art designs out there that you could look up and use as your own references.
Leaves Nail Art
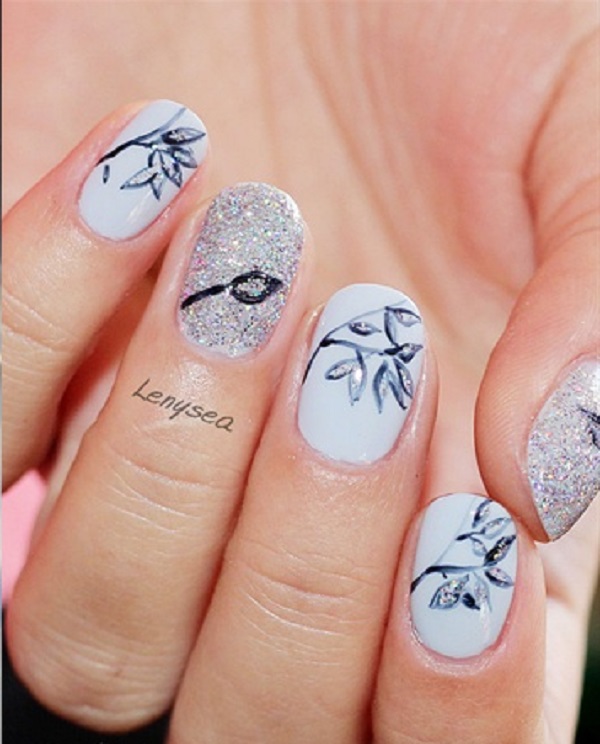
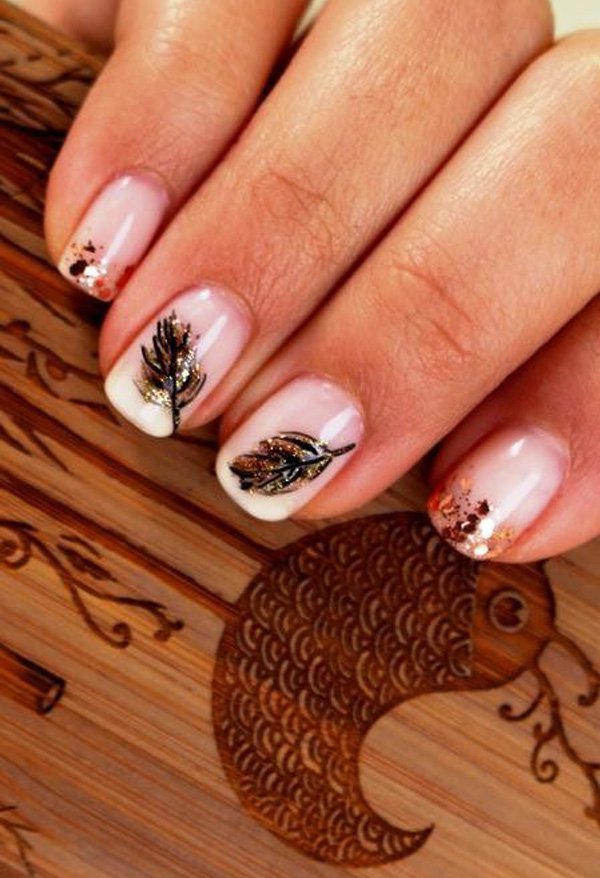
Beautiful black and white leaf nail art design. The white background compliments the black colored feather styled leaves look perfect accompanied by the silver glitter polish.
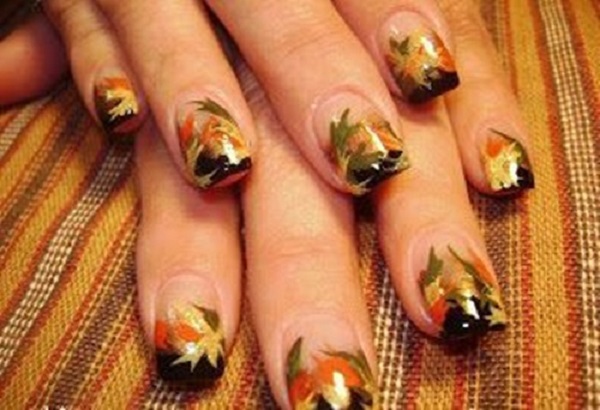
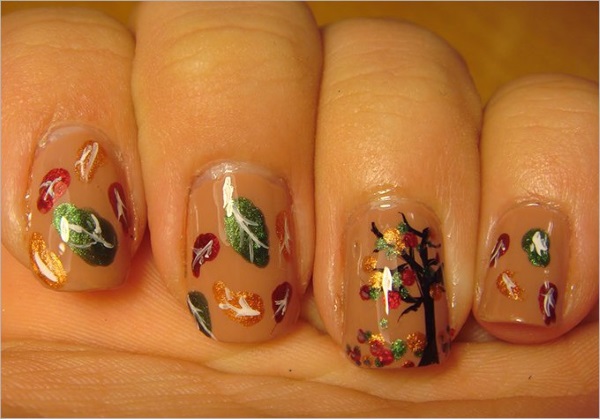
Warm colored and pretty leaf nail art design. The combination of melon and brown nail polish give out a homey vibe with the addition of red, green and orange for the leaves.
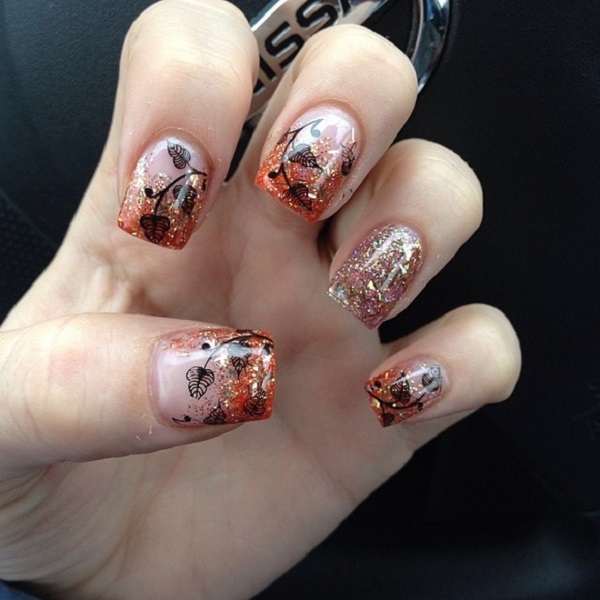
Glitter inspired leaf nail art design. The orange glitter polish is creatively designed as a French tip. The leaves are painted on top using black polish.
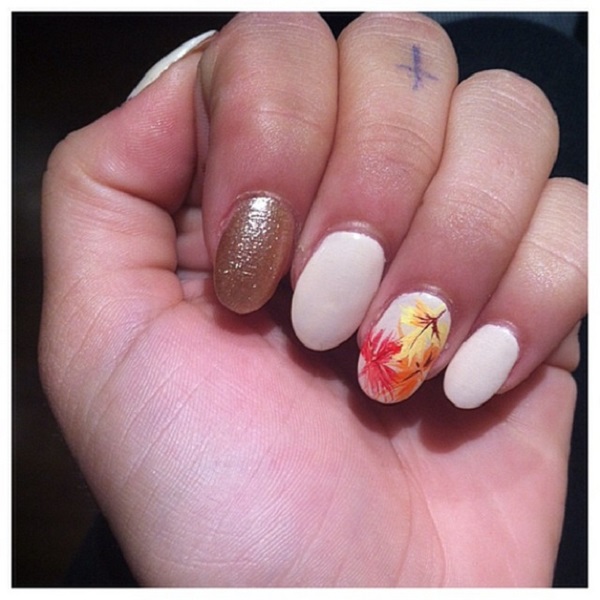
Elegant looking leaf nail art design, positioned at the tip of the nails is multi colored autumn leaves which makes the design even prettier.
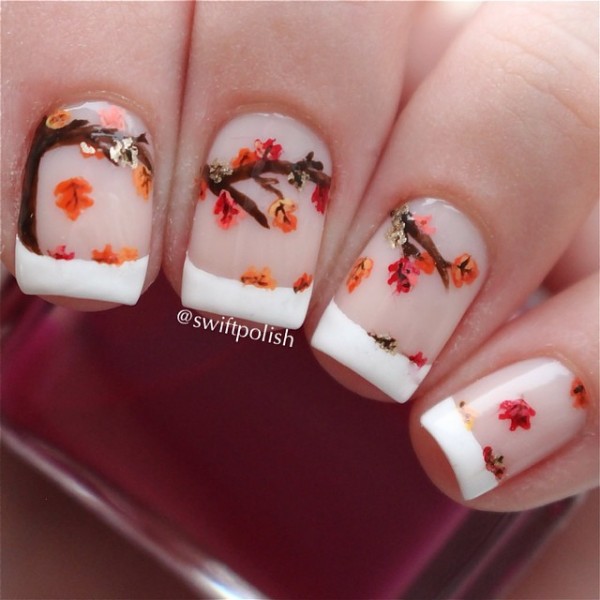
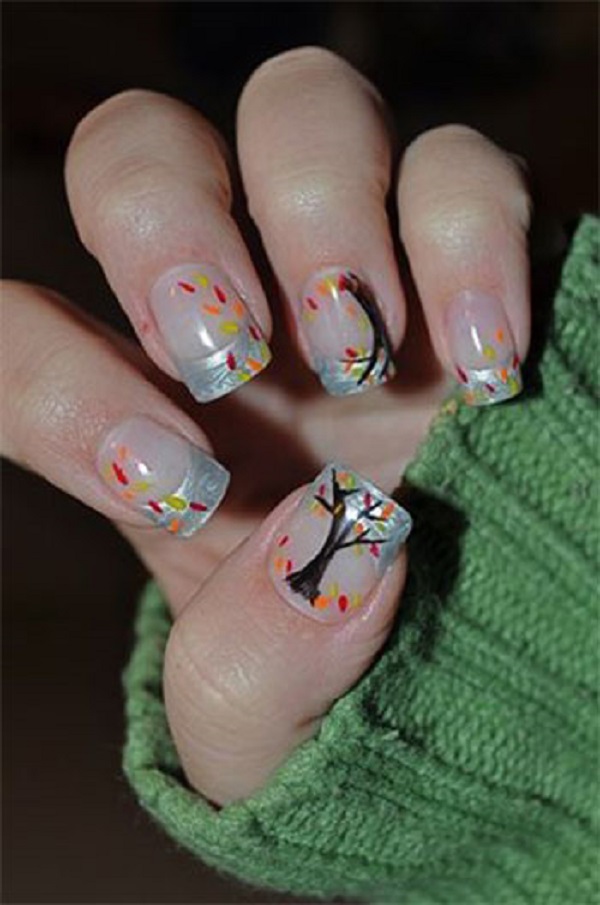
French tip inspired leaf nail art design. While the French tips are in white polish, the leaves are painted as dropping slowly from tree branches signifying autumn.
Sandwich style leaf nail art design. Using sheer polish and stencil cutouts, this leaf nail art design looks absolutely dazzling.
Continuous leaf nail art design. A quirky yet very interesting nail art design where the nails are continuing image from one to another. The nail art depicts the leaves being blown away by a wind on a meadow.
Creative leaf nail art design for the French tip. Give more attitude to your French tips with this gradient and glitter inspired nail polish with golden leaves on top.
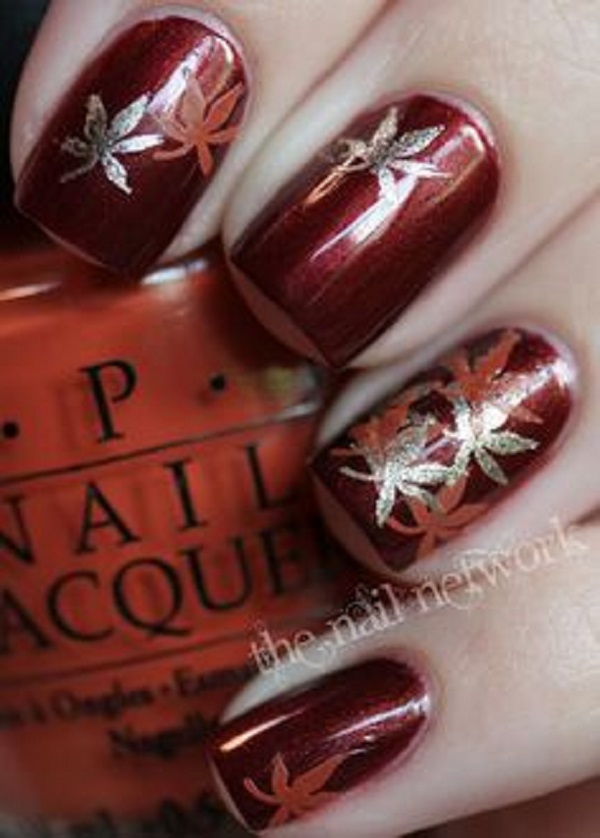
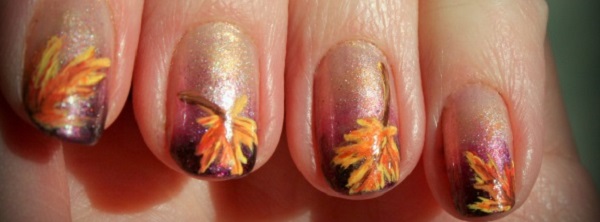
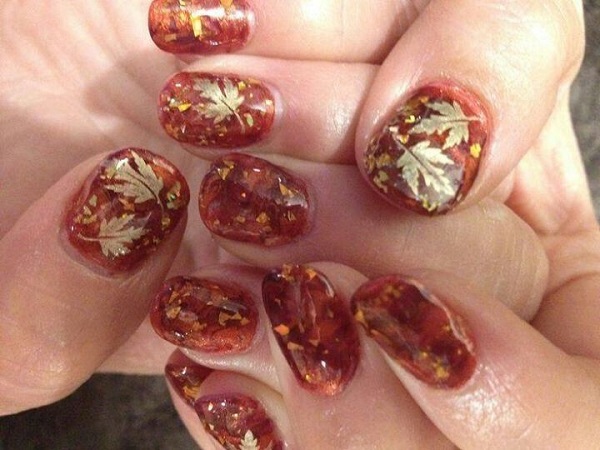
Red and silver themed leaf nail art design. This nail art design doesn’t only look fiery at first glance, but at the same time gives you a homey vibe because of the autumn leaves painted on top.
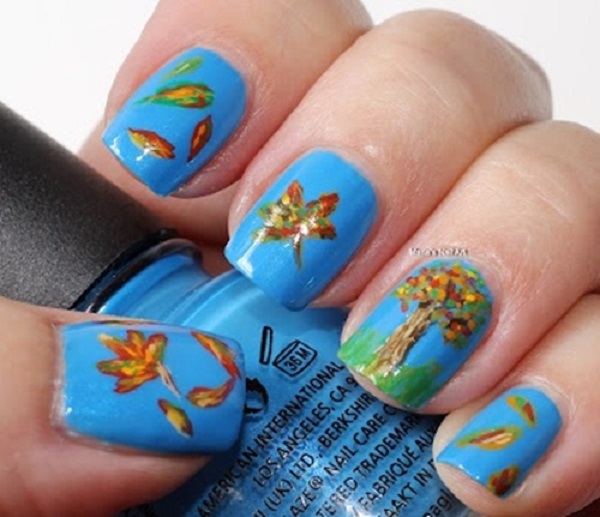
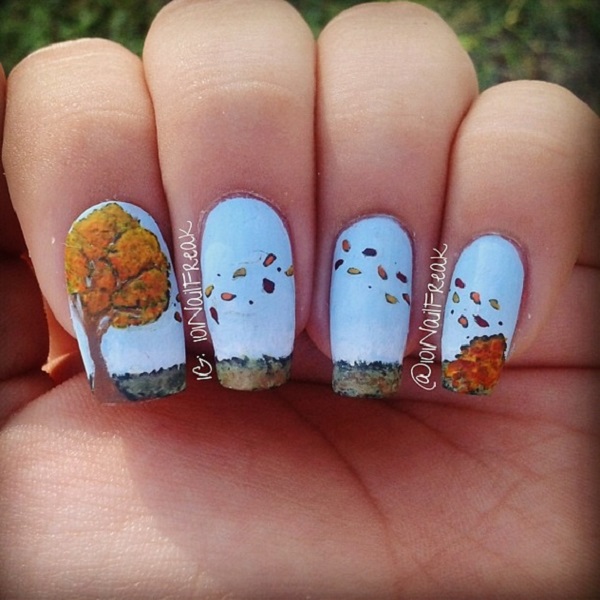
Brightly colored leaf nail art design. Make your nails pop out with a bright blue base color and topping it with wonderful looking fall leaves falling from the sky.
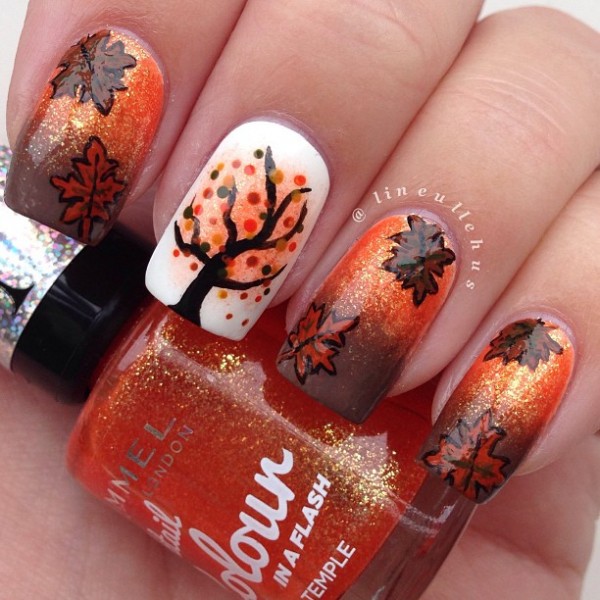
Pretty leaf nail art design in orange and brown color combination. Mix up the shades of orange and brown with white and black to produce an afternoon sunset like feel to the environment which makes your nails look warm and eye catching.
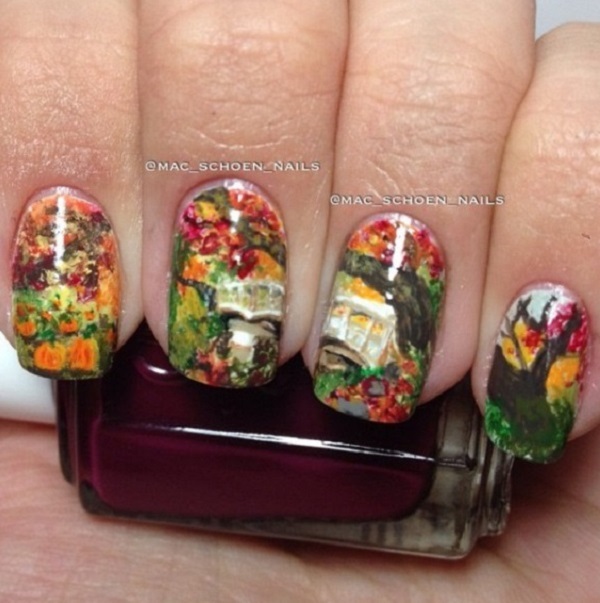
A multi colored leaf nail art design. Fill your nails with colorful autumn leaves and trees to make it really vibrant and a sure head turner.
Simple yet beautiful leaf nail art design. Draw small falling golden leaves on top of your white base coat to give this warm and welcoming feel that the fall season always has.
Minimalist leaf nail art design. The smaller the design the more attractive the nail art looks even from afar. The beautiful fall leaves are painted with light colors and strokes.

White and violet leaf nail art design. Use contrast to your advantage with this beautiful nail art design. Contrasting with the dark violet hue as background color are serene white leaves falling from the tree.
Simple but beautiful leaf nail art design with French tips. Coat your leaves with glitter polish to make it look even special. The neat and clean finish of this design is what makes it stand out even more.
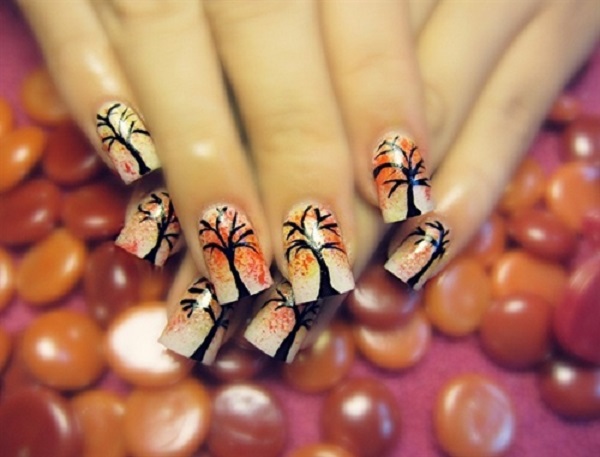
A really pretty looking leaf nail art design. A silhouette version of the trees is painted with the black nail polish while there is an explosion of colors for the leaves in contrast to the white background.
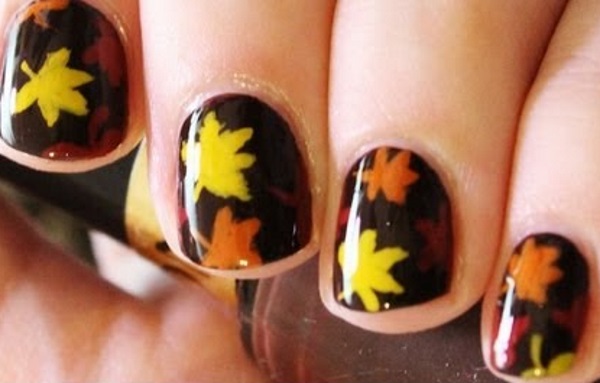
Leaf nail art design against a black background. Black polish can give you a number of wonderful designs to work on and this is one of those where you can play around with what colors to use.
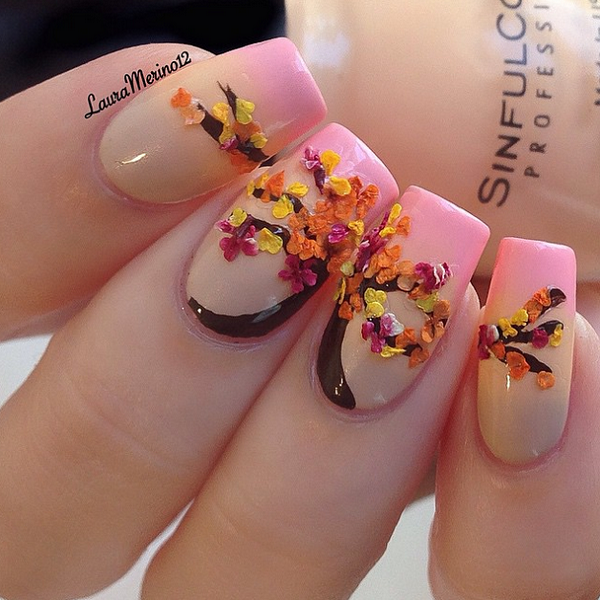
Beautiful pink themed leaf nail art design. The French tips are painted with a gradient pink while the brown tree painted is decorated with pastel embellishments on top for the leaves.
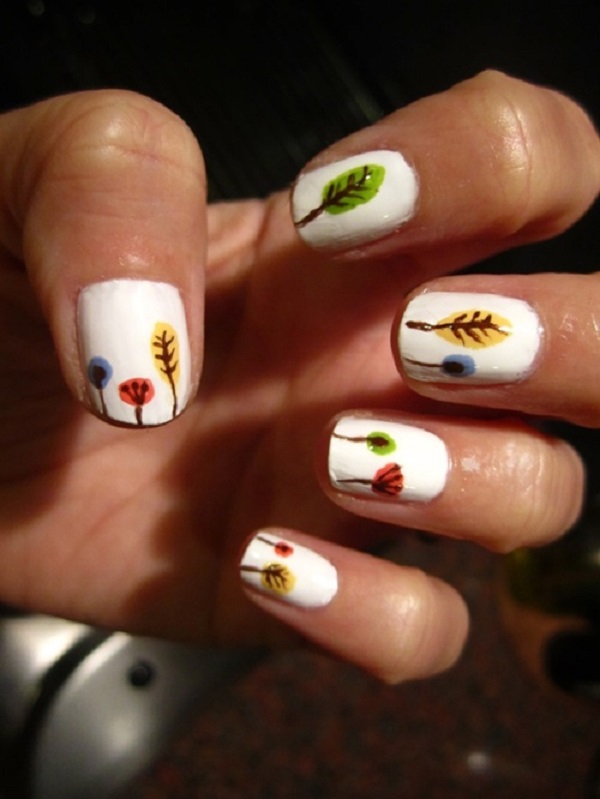
Multi colored and white leaf nail art design. Enjoy decorating your nails in plain white background by using bold lines and colors such as this to give life to the design.
Candy colored leaf nail art design. A cute leaf nail art design that features light blue French tip with trees and multi colored leaves falling from it.

Wonderful looking leaf nail art design. You can always amp up the leaves when you are painting them on a white background, add more color and depth to make the leaves stand out.

Elegant looking leaf nail art design. The autumn leaves on the nail art design are simple beautiful and complements the dark silhouette of the trees and the white background.

Golden brown colored leaf nail art design. The combination of the golden brown base color with the white and chocolate brown leaves makes a perfect pairing for the nails to look luxurious and eye catching.

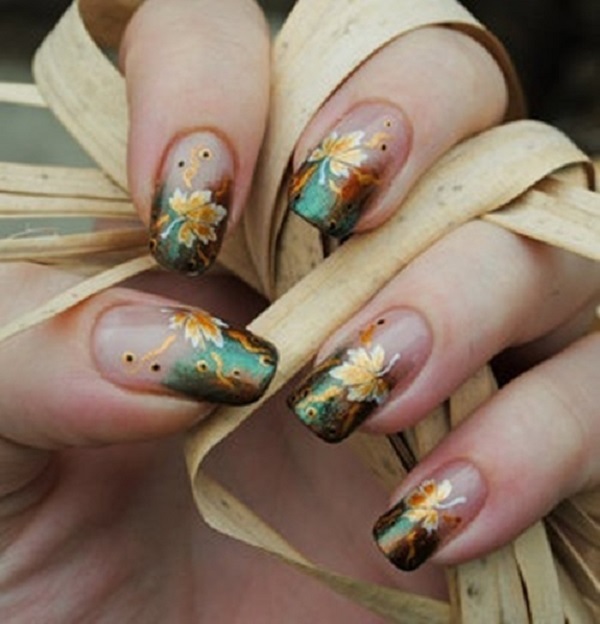
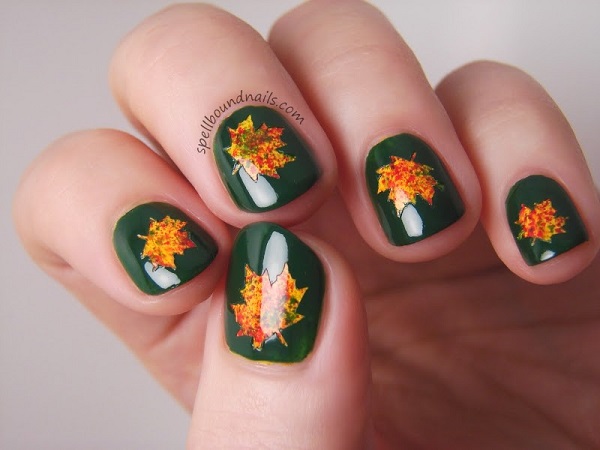
Dark green themed leaf nail art design. Never be too afraid to go with unique colors on your nails. The fall colored leaves help fill the green space and adds more life to your nails.
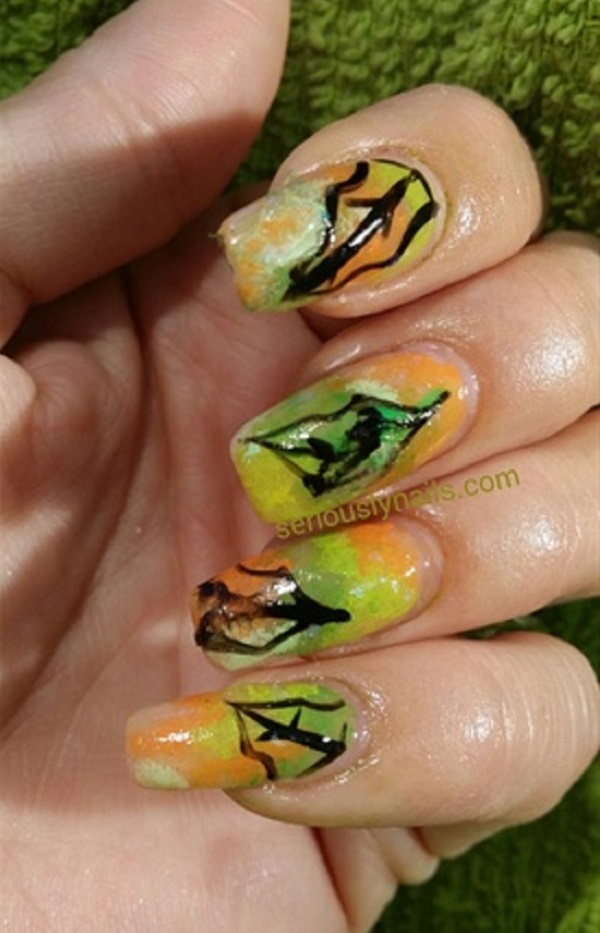
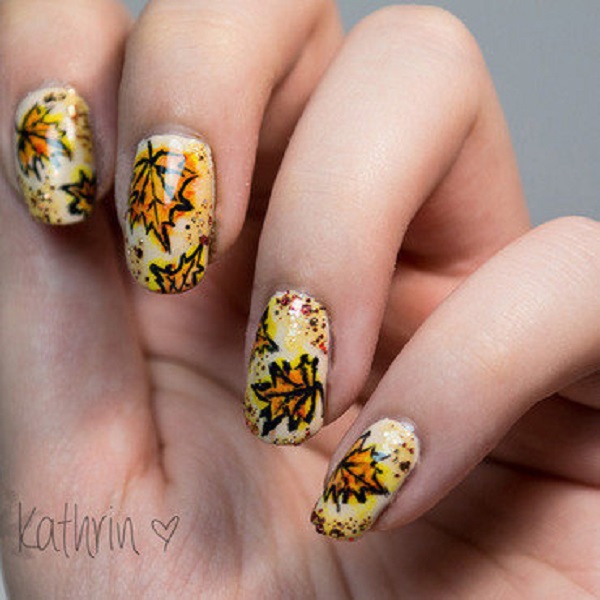
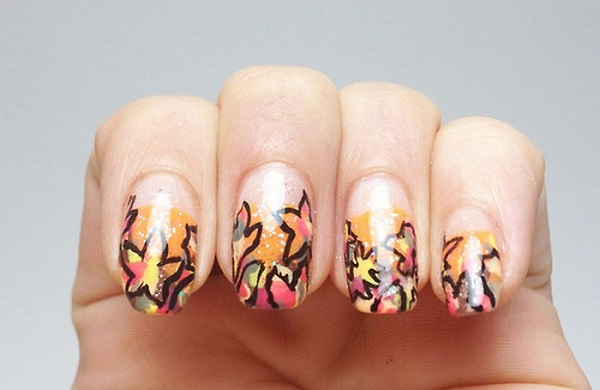
Quirky and pretty gradient leaf nail art design. Using orange, green and yellow for the gradient background the outline of the leaves in black painted on top helps make the nails have a bold statement.

A really cute and simple polka dot inspired leaf nail art design. Paint your nails in this cherry red nail polish and add your own twist of polka dot leaves representing fall.
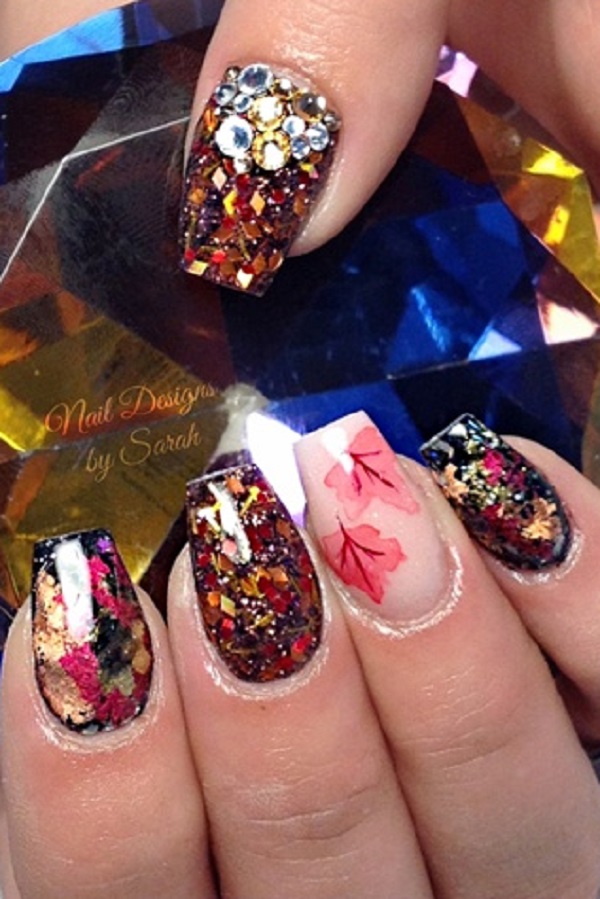
Leaf nail art design inspired by foil. Cut out colorful foil and arrange them to form an almost abstract and interesting looking leaf nail art design.
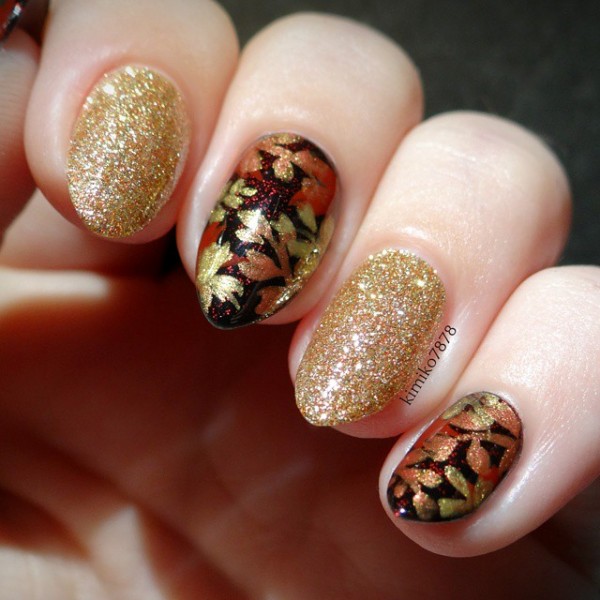
Black and gold themed leaf nail art design. Make your nails stand out by using glitter gold polish in contrast to the black background of the other nails. Adding the glitter polish of gold and orange on top as leaves also gives your nails more appeal.
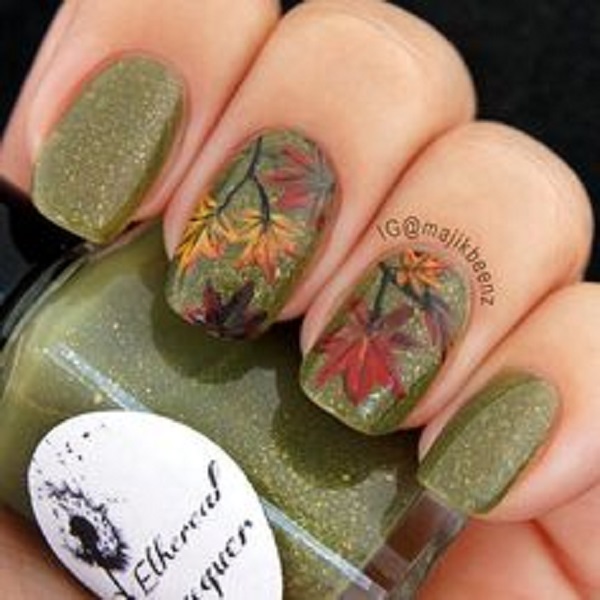
Olive green themed leaf nail art design. Nothing beats any color to partner with fall colored leaves than green hues. Pretty, homey and looks absolutely perfect.
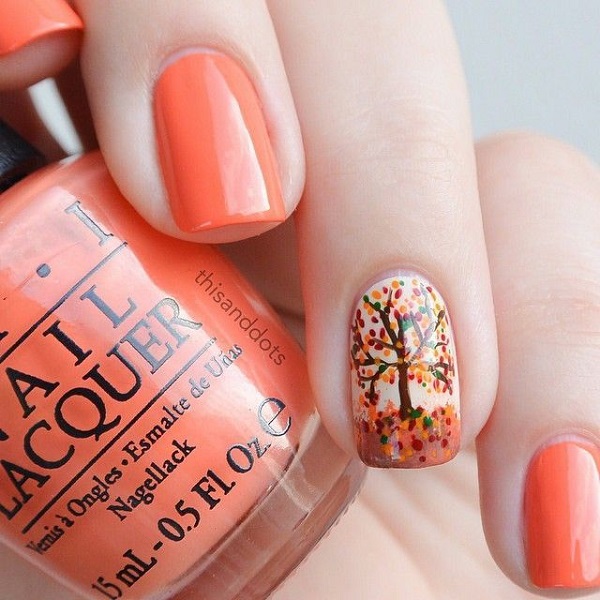
A very cute leaf nail art design. Coat your nails with plain white base color and unleash your creativity by painting small and cute watercolor versions of trees with fall colored leaves.
Beautifully painted leaf nail art design. A really pretty and cute nail art design with multi colored leaves falling from the tree depicting your typical autumn scenes.
Green and yellow orange leaf nail art design. the best thing about this combination is that it helps each color pop out as the darker green complements the lighter orange on top and vice versa.
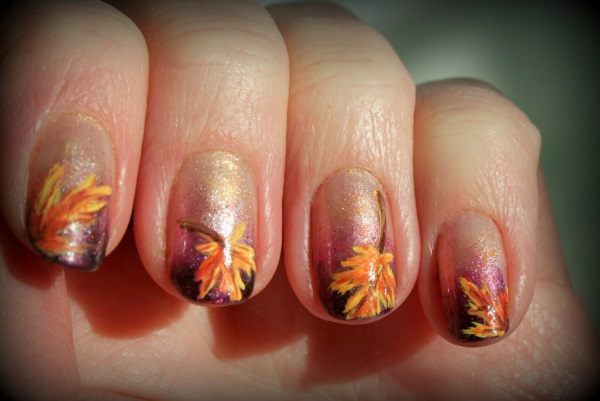
A wonderful leaf nail art design for the French tip. When it comes to French tips, one can never really run out of ideas. The gradient violet glitter polish simply makes the nail art look more regal along with the gold leaf painted on top.